Monday, September 30, 2013
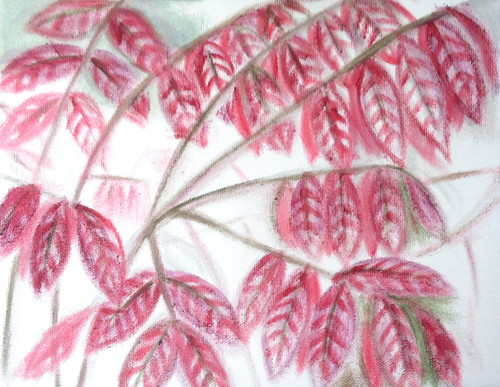
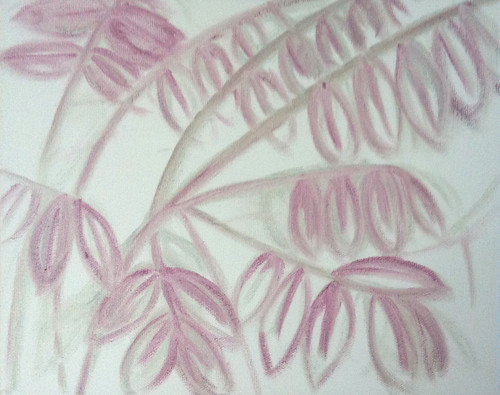
Red Leaves (Oil Bar Painting as of Sept. 28, 2013)
This oil bar painting (in progress) is loosely based on one of my photos (posted here Sept. 25). This is how my painting looked two days ago, Sept. 28. I used more red to outline the veins of the leaves facing toward the viewer, and used some solid red to indicate the leaves that are visible from the back. At this point, I am still working out placement, and using pattern vs. solid leaves just to help me see where things are. This is a small canvas (8 x 10 inches).
Sunday, September 29, 2013
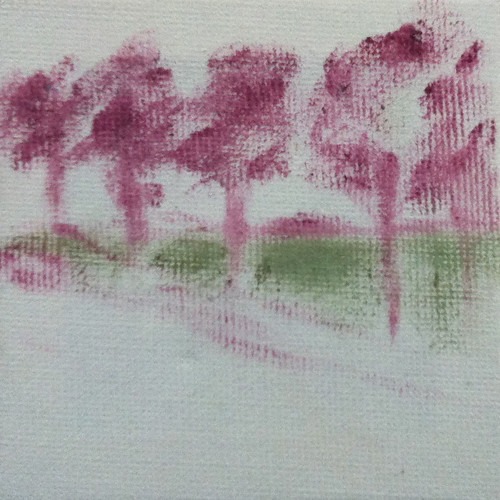
Row of Trees (Mini-Painting as of Sept. 27, 2013)
This little painting is 3 inches x 3 inches and is a work in progress. I bought this little canvases a couple of months ago, and I am trying to work on mini-paintings at the end of my painting sessions, because I almost always have a little bit of leftover paint. This is how this little painting looked two days ago (September 27, 2013).
Saturday, September 28, 2013
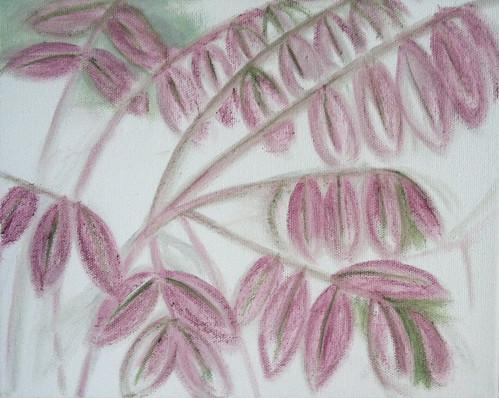
Red Leaves (Oil Bar Painting as of Sept. 27, 2013)
Here is my oil bar painting in progress as it looked yesterday. This is going to be a small oil bar painting (8 x 10 inches). I am using one of my photos as a reference (posted here on Sept. 25.) Yesterday I continued to work on placement and composition. I used green to indicate the mid-line of the leaves, and used alizarin crimson to define and outline the leaf shape a bit more.
Friday, September 27, 2013
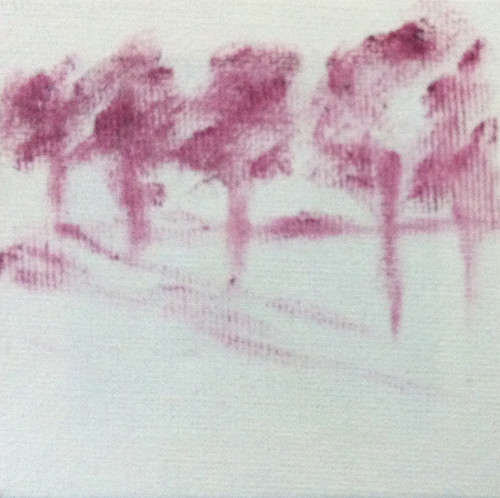
Row of Trees (Mini-Painting as of Sept. 26, 2013)
Yesterday I started a new oil bar painting of red leaves (posted here yesterday), 8 x 10 inches on canvas. I usually have extra paint when I am finished painting for the day, so I decided to use it to start this little mini-painting as well, still a work in progress. This little canvas is only 3 x 3 inches.
Thursday, September 26, 2013
Red Leaves (Oil Bar Painting as of Sept. 26, 2013)
Today I got started on this painting, which is loosely based on the photo that I took on November 20, 2011. This is one of my favorite shrubs because it turns bright red in late fall. I think it is called "burning bush." Yesterday I created a close crop of the original photo to use as my reference. This morning I just worked out the composition and placement with gray, and then added a little bit of red when I started to get lost in all the lines. This is oil bar on a small canvas (8 x 10"). I want the leaves to be close to "life size" on the canvas.
Wednesday, September 25, 2013
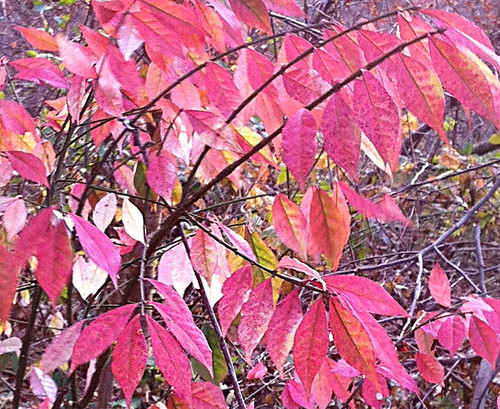
Bright November Leaves (Closeup)
I am getting ready to start a little series of paintings; I am planning to paint close-in views of branches at different times of the year (covered with leaves, flowers, berries, and snow). These are going to be small paintings (8 x 10 inches). Last night I selected one of my photos that I plan to work from, a picture of red leaves in November, originally posted here on Nov. 20, 2011. Yesterday I posterized and cropped it to get a rectangular format. (See yesterday's post.) But I want the leaves and branches on the canvas to look as close to full size as possible, so this morning I realized that I need to modify the crop. So today I did another crop so that the leaves will look just about full size at 8 x 10 inches. Here it is, and I plan to use this photo as a reference when I start painting.
Tuesday, September 24, 2013
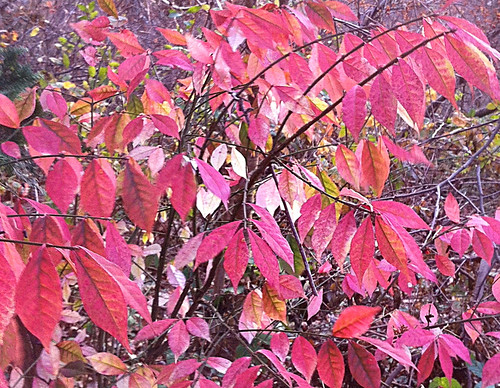
Bright November Leaves (Posterized and Cropped)
I am planning to paint this week, starting a group of small paintings (approximately 8 x 10). My idea is to do little landscapes, but closeups that focus in on branches (covered with flowers, or leaves, or berries, or snow). Tonight I was looking through my photos to pick some out to paint, and I came across a photo posted here on November 20, 2011. So I opened it in Painter and resized it, then worked on the focus. After than, I posterized it and then cropped it to get a rectangular format. I think this is going to be the reference photo for my first little painting of branches.
Monday, September 23, 2013
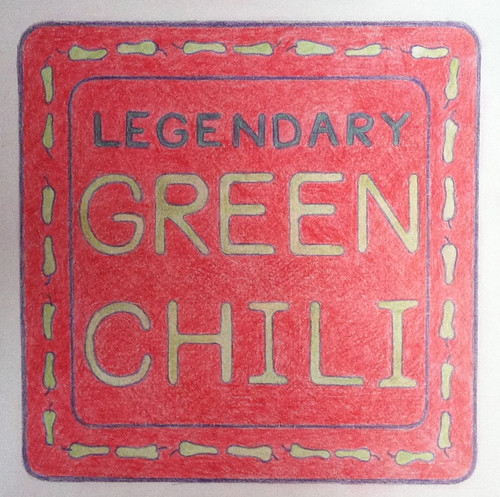
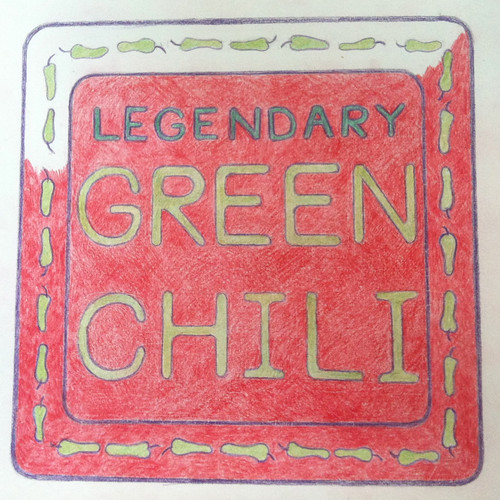
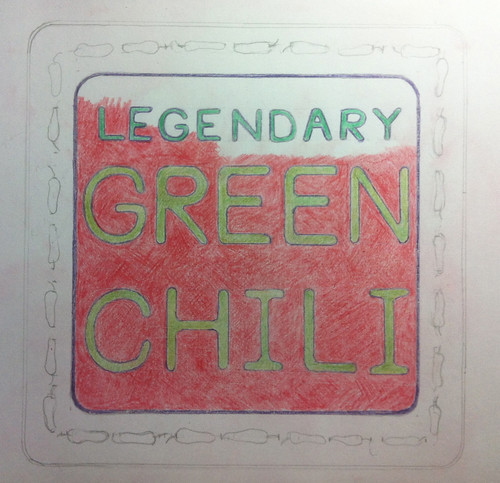
Legendary Green Chili
This is the final version of this project, drawn and hand-lettered with colored pencil. This is an illustration for a recipe that is now posted on our food blog, and you can see the illustration and read the recipe at seasoningforeverypalate.wordpress.com. Just look for the recipe for "Legendary Green Chili".
Sunday, September 22, 2013
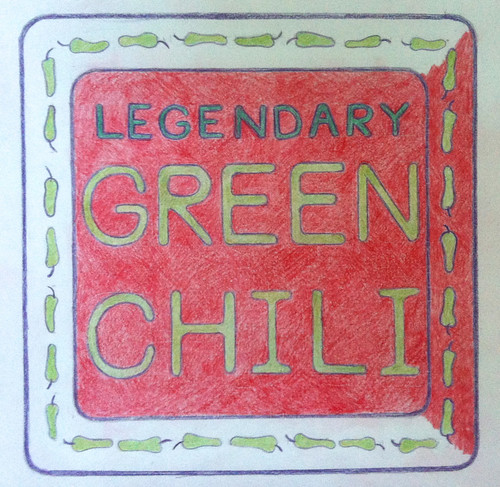
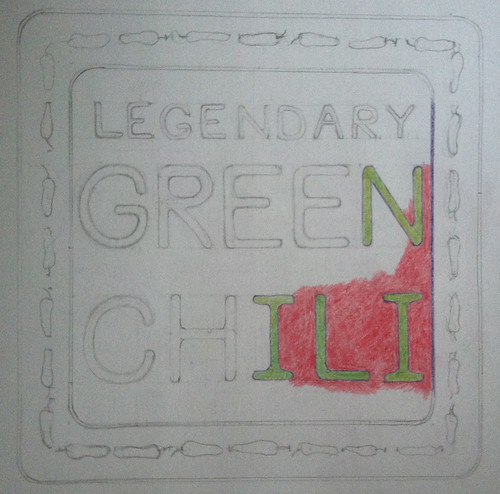
Legendary Green Chili (Illustration as of Sept. 12, 2013)
For the past few weeks, I have been working on this project a little bit at a time. I am going to use it in a day or two as an illustration of a recipe on our foodblog (seasoningforeverypalate.wordpress.com). This is how it looked on Sept. 12, 2013, when I was still working on finishing up the border.
Saturday, September 21, 2013
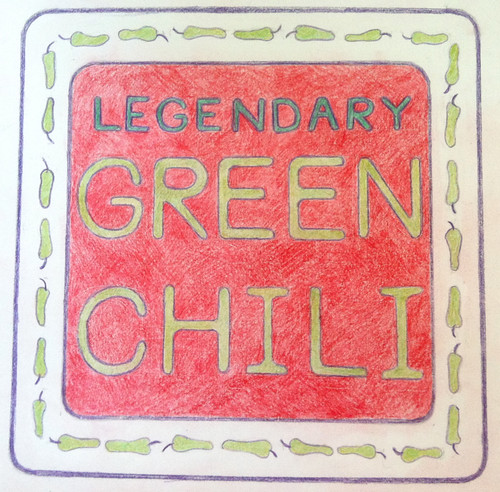
Legendary Green Chili (Illustration as of Sept. 9, 2013)
This is a project that I have been working on lately, a little bit at a time, using colored pencil on paper. This is going to be an illustration for a recipe in our food blog (seasoningforeverypalate.wordpress.com). This is it how it looked on Sept. 9, when I started coloring in the background of the border.
Friday, September 20, 2013
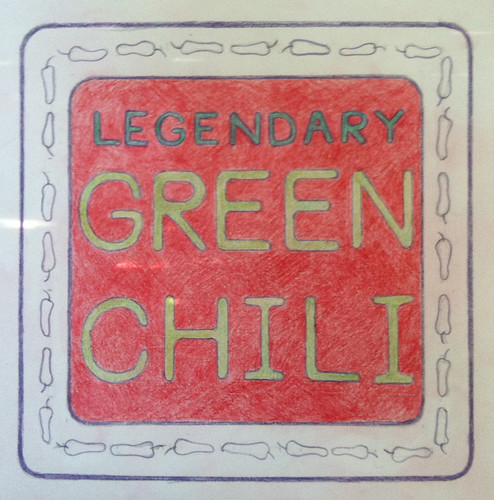
Legendary Green Chili (Illustration as of Sept. 8, 2013)
Here is a little project that I have been working on. This is going to be an illustration for a recipe in our food blog (seasoningforeverypalate.wordpress.com). This is how it looked on September 8. I was still working on the border, coloring in all those little green chilies with colored pencil.
Thursday, September 19, 2013
Legendary Green Chili (Illustration as of Sept. 7, 2013)
This is a work in progress. This is soon to be posted as an illustration for a recipe on our food blog, seasoningforeverypalate.wordpress.com. I learned to do hand lettering in my high school art classes, but it has been a while. I have been working on this a little bit at a time, trying to get high-saturation color with colored pencil, which is slow and tedious. So I am fast-forwarding a few days to September 7th. The letters and background have been colored in, and work is starting on the border.
Wednesday, September 18, 2013
Legendary Green Chili (Illustration as of Sept. 3, 2013)
I have been working on this project for the past few weeks. This is going to be an illustration for a recipe in our food blog (seasoningforeverypalate.wordpress.com). I used colored pencil to add color, and it was very time-consuming, so I am skipping ahead a little bit. At this point, I was still working out the color scheme. I decided to make the larger letters the color of green chilies, and the smaller letters a darker green (like jalapeno peppers). I mixed purple into the green to get the color I wanted. I am also using purple for outlines.
Tuesday, September 17, 2013
Legendary Green Chili (Illustration as of Sept. 1, 2013)
I have been working on this piece to use as an illustration for a recipe that I am going to publish on our food blog (seasoningforeverypalate.wordpress.com). I decided to use colored pencil to color it in, and this is how it looked on September 1, 2013. That day, I was trying to work out the color scheme.
Monday, September 16, 2013
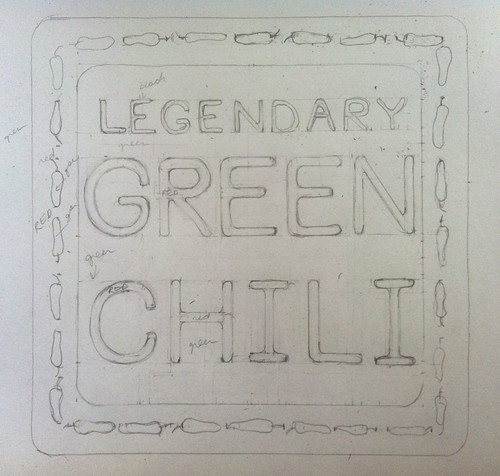
Legendary Green Chili (Sketch)
Here is a project I have been working on for a few weeks, a little bit at a time. This is the beginning of an illustration for a recipe that I am going to publish in our food blog https://seasoningforeverypalate.wordpress.com. This is how it looked on August 30, when I had finished sketching it out in pencil. It's been a while since I did this kind of hand-lettering, something I learned in high school art class. You can see all the measurements, marks, and notes-to-self about what colors to use.
Sunday, September 15, 2013
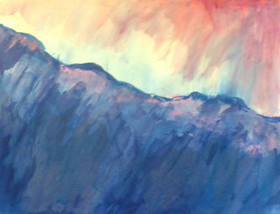
Mountain Peaks with Pink Sky (Acrylic Painting) Repost
I painted this several years ago, a water-media painting of the mountains done with acrylics on paper. I originally posted it here on November 30, 2006. It was part of a show I had called "Mountain Daydreams" because this set of paintings was done from my imagination and memories of the Colorado mountains. I always thought this painting looked like a rainstorm over the mountains, with the sun just breaking through. I am reposting this tonight because my home state has been on my mind all weekend, and I have been checking on family and friends who live there. Of course I have been thinking about the floods in Boulder, where I used to live while I went to college and later grad school. In fact, it was in Boulder where I first learned to use acrylics for water-media painting (from Gene Matthews, an amazing watercolor teacher who taught at the University of Colorado).
Saturday, September 14, 2013
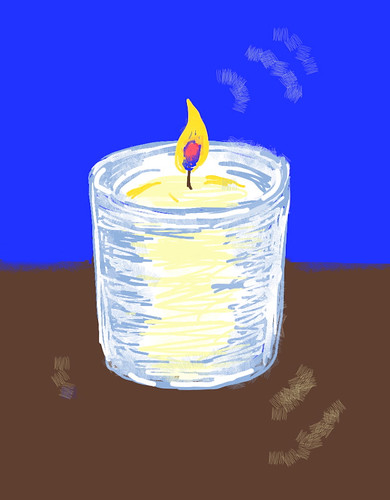
Candle (Digital Drawing)
Recently I used the Brushes app on my iPad to make this little drawing of a memorial candle. (the kind used on Yom Kippur). The Brushes app captures a stroke-by-stroke video as you draw. Yesterday I posted the video, and tonight I cleaned up the drawing in iPhoto and am posting it tonight to say Happy New Year to those celebrating and to wish all my facebookers all the best in the months ahead. If you want to see the video, follow this link: www.flickr.com/photos/randiart/973451165/
Friday, September 13, 2013
Candle
Candle a video by randubnick on Flickr.
Thursday, September 12, 2013
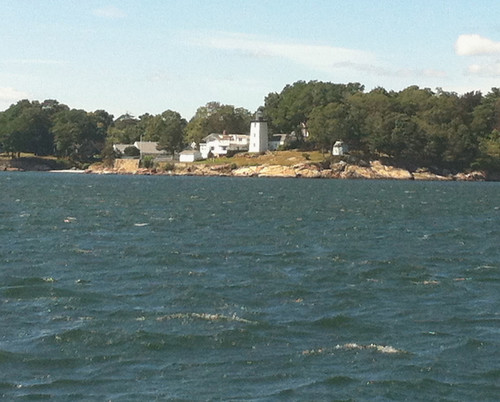
Hospital Point (Posterized Photo)
Here's another image from Sunday's boat ride. This is a picture of Hospital Point, a landmark in Beverly, MA, and one of the places we go to get a view of the ocean. Sunday's boat ride to Misery Island included a little tour of Beverly's "Gold Coast," so I this time I had a chance to see Hospital Point from the ocean. Tonight I edited the original photograph in iPhoto and then used Painter to posterize it.
Wednesday, September 11, 2013
World Trade Center from Empire State (Digital Woodcut)
This image began as a photo that I took back in 1988, on a trip to New York City. I took a tour of the Empire State Building, and was taking photos from the observation deck, through the fencing. That day, I was excited about being at the Empire State Building, and getting a photo of the Twin Towers was incidental. I didn't know I wouldn't get that many chances. I first posted the photo here on September 11, 2005, and since then I have created a couple of different versions of it. Today I made one more, an image created with Painter's color overlay and digital woodcut effect.

Tuesday, September 10, 2013
Sailboat and Islands (Posterized Photo)
This image began with a photo that I took during Sunday's boat ride from Salem, MA to Misery Island. I loved the way the sail boat looked between two islands, so I took a picture. Today I cropped the original image to get this composition. The body of the boat wasn't showing up, so I brightened it with a color overlay. Then I posterized it, and this is the final version.

Monday, September 09, 2013
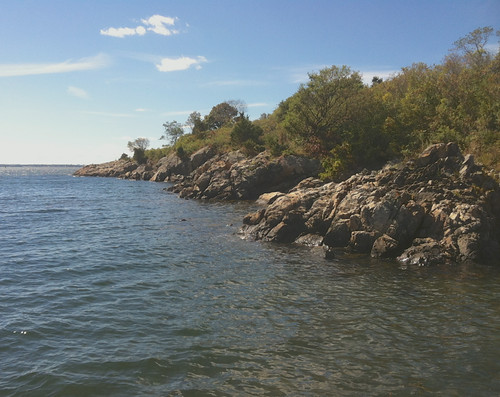
Quick Look at Misery Island
Yesterday my daughter and I went on a boat ride from Salem out to Misery Islands. The boat left from Salem Willows and went north along the coast (parallel to Route 127) and it was fun to learn more about the history of the "Gold Coast" near Beverly, Then I finally got a look at some of those islands I have often wondered about. (You can see them from the beaches in Beverly, MA.) This boat ride takes passengers to Misery Island, where there are hiking trails. Some people get off the boat, hike for a couple of hours, and then catch a later boat back. But a lot of people just stay onboard for the ride back, which is what we did yesterday. It's a beautiful little island, with scrub and rock outcroppings. There's no misery there as far as I can see. We landed right on the beach to pick up passengers, so I was able to get a few quick pictures of Misery Island. This is one of the best of them. Tonight I used iPhoto to adjust the exposure, and lighten up some shadows, and then I cropped the image to get this composition.
Sunday, September 08, 2013
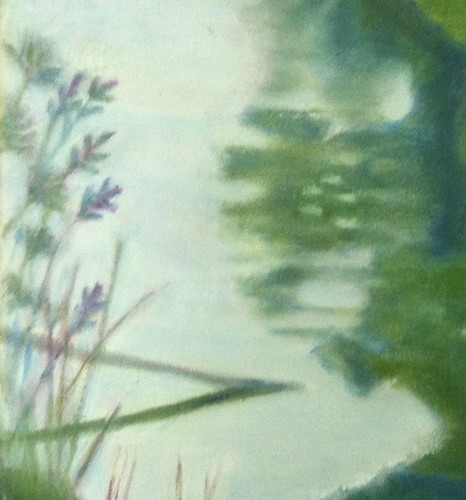
Detail of Reflections (Oil Bar Painting FInished Aug. 25, 2013)
Here is a detail from the oil bar painting as it looked when I finished in back on August 25th. Once I had modified the composition by painting out the tree on the left-hand side, I needed to change the shapes created by these grasses to make the composition work. Of course I can find things in this painting that I could change. That is always true, but this painting was especially hard for me. (I was painting above my pay grade.) But I am calling it. I am at peace when I look at this painting, and so it is finished. Time to get ready for something new.
Saturday, September 07, 2013
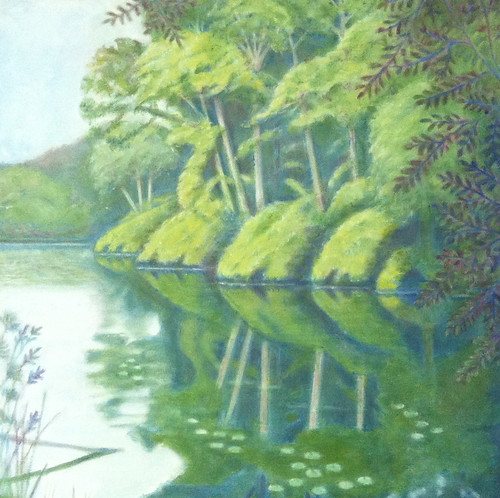
Reflections (Oil Bar Painting) Finished Aug. 25, 2013
Here is my oil bar painting, finished on August 25. This landscape is based on a photo that I took at Bradley Palmer State Park (Topsfield MA). You can see the photo posted here on June 14th. On the 25th, I decided to make changes to the shape of the shore line to improve the perspective. This involved a little bit of repainting and moving things just a bit, but it was worth it. While I was at it, I adjusted the shapes of the foliage on the bottom left. Then I was ready to say it was finished.
Friday, September 06, 2013
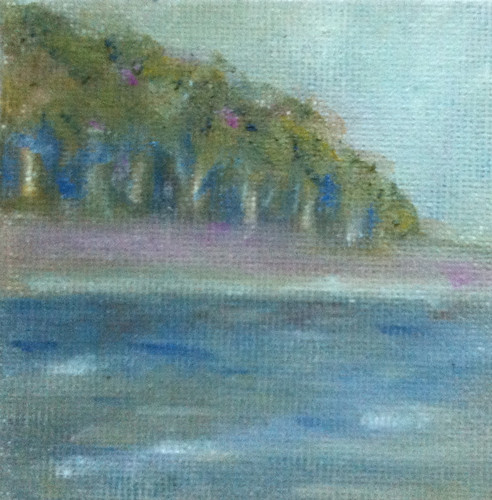
Woods and Shore (Mini-Painting Final on Aug. 24, 2013)
Here is my mini-painting as of August 24th. After I had worked on my full-size (20" by 20") oil bar painting Reflections, I went back to this little 3" by 3" canvas that I started on August 21st. The main changes were adding more color, including some pink to the shore, and creating more variety in the stand of trees. At that point, I declared this miniature oil bar painting finished, and sealed the edges of my tiny canvas. It was a lot of fun to do this, and I have a stack of these small canvases, so I plan to paint some more.
Thursday, September 05, 2013
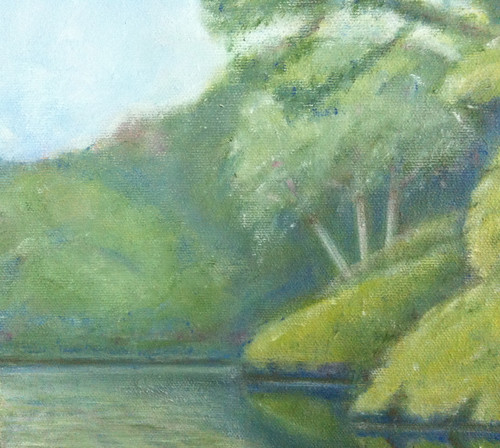
Detail of Reflections (Oil Bar Painting as of August 24, 2013)
Here is a detail from my oil bar painting in progress. (I have been painting a landscape loosely based on a photo that I took at Bradley Palmer State Park in Topsfield, MA.) This is a closeup of the painting as it looked on August 24th, which was the day I took out (painted over) the tree on the left-hand side. In this view you can see that I repainted the background, creating some shapes to add interest. To be continued. . . .
Wednesday, September 04, 2013
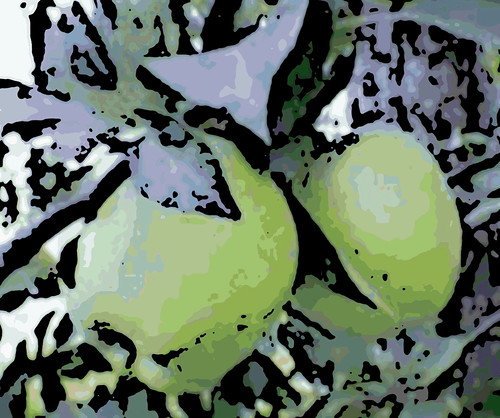
Two Apples at Nashoba Orchard (Digital Woodcut)
This image started with a photo that I took back in 2005 during a visit to the Nashoba Orchard. These beautiful apples were still on the tree. Last night I used Painter to apply a woodcut effect, and then did some cropping and color overlay to get this image. I plan to send these apples out to family and friends along with Rosh Hoshana greetings.
Tuesday, September 03, 2013
Reflections (Oil Bar Painting as of August 24, 2013)
This is my oil bar painting in progress as it looked on August 24, 2013. It is based on a photo that I took at Bradley Palmer State Park, in Topsfield, MA. (posted here June 14). If you compare this to the previous version, you will see that the tree on the right is gone. I thought the painting was finished on August 21, so I started sealing the edges of the canvas. But I kept thinking about changing the composition, eliminating the little tree on the left. I really liked that little tree, but I thought the composition would be better without it. I felt that the composition needed a quiet, peaceful area where the eye could rest. But before making the change, I decided to try it out digitally to see if I liked it. So on August 23, I used Painter to modify a photo of the painting and cover up the tree. I compared versions with and without the tree on the right, and then made my decision to make the change. The morning of the 24th, I got up early and decided to try to paint over some branches to see if it could be done. It seemed to be possible, so I kept going, repainting the sky and the background. I had become quite fond of that little tree, and sorry to see it go. But if you look closely, you will see traces of its branches in the water, in the clouds, and in the distant hills. At this point, the painting was really almost finished, just a little bit more to go . . . .

Monday, September 02, 2013
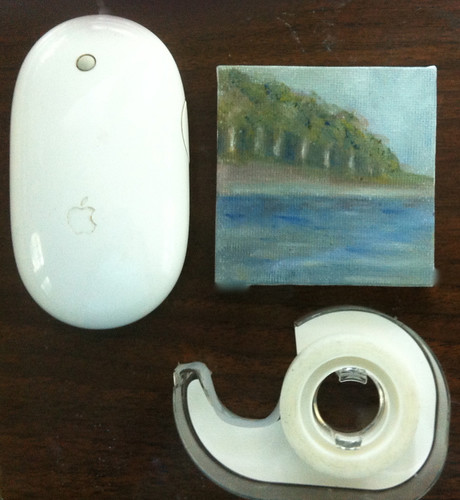
Woods and Shore (Mini-Painting with Mouse and Tape)
Yesterday I posted this little miniature oil bar painting as it looked on August 21st. It is only 3 inches by 3 inches. I took this photo of it with a tape dispenser and a mouse, just to show the scale.
Sunday, September 01, 2013
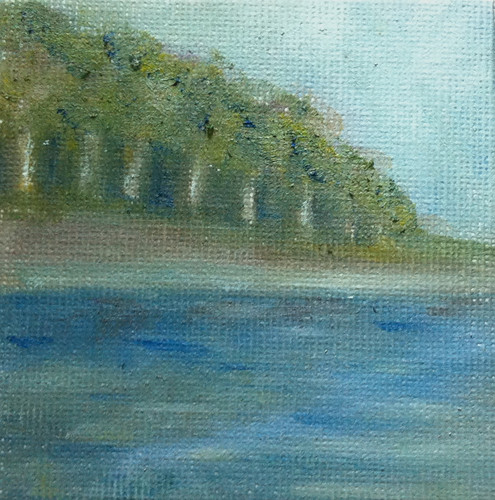
Woods and Shore (Mini-Painting as of August 21, 2013)
A few months ago, I picked up some miniature canvases at the art supply store. I liked them because they have a square format, just like my full-size oil bar paintings. For the last week or so of working on my oil bar painting, I have been making small changes, but mixing up several colors so I always had paint left over. One day I decided to finish my painting session by painting a miniature landscape on a little square, using some leftover paint. So here is my first 3-inch painting as it looked on August 21st!
Subscribe to:
Posts (Atom)