Saturday, June 21, 2008

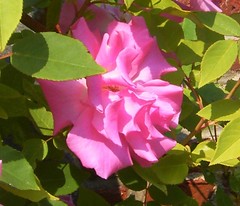
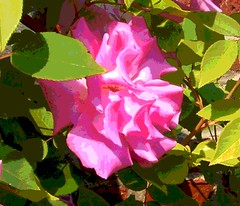
Pink Rose by the Wall (Posterized Photo)

Pink Rose by the Wall (Posterized Photo) Originally uploaded by randubnick

This is the same photo I posted yesterday (a pink rose near a brick wall), posterized in Painter IX. In this closeup, the brick wall is barely visible through the leaves, but I like the contrast of the color of red brick with the sweetie-pie pink of the roses and the acid green of the leaves.

Friday, June 20, 2008

Pink Rose by the Wall

Pink Rose by the Wall (Originally uploaded by randubnick)

On a recent walk at Long Hill Gardens, there was just one rose bush already in bloom, near a brick wall in the garden, so I took some pictures. Some of the blossoms were already dropping some petals, perhaps because of the heat, but one of the roses was perfect! It looked like it belonged on a birthday cake! Tonight I cropped the photo to focus on that one perfect rose, and here it is.

Thursday, June 19, 2008

Self-Portrait Photo with Free Lace Scarf

Self-Portrait Photo with Free Lace Scarf (Originally uploaded by randubnick)

On Monday night, in the fiber arts class that I am taking at Red Brick, I finished up the free lace scarf I have been making. I just added a little red ribbon as fringe on each corner, and I was done. Tonight I decided to photograph it to show how it looks over clothing, and this turned into another project! I wanted to learn to do this with my new digital camera. It was a little tricky getting used to the camera and I discarded a lot of mistakes: blurry photos, bad aim, missed shots, not to mention photos in which I looked like hell. Finally I tried taking the photo in front of a mirror so I could see what I was doing. That worked better, and I got a useable image of myself wearing the scarf. But then I noticed the background! I had captured a corner of the air conditioner, a window shade, a stack of papers, and a pile of books. Well, I wasn't about to start over, so I opened the image in Painter IX and used some quick digital airbrush to clean up the room! (I resisted the temptation to apply the digital airbrush to my face!) Anyway, here is the photo of me wearing the free lace scarf. It is fun to have it, it goes with everything, and I am planning to wear it to open studios at Red Brick this weekend.

Wednesday, June 18, 2008

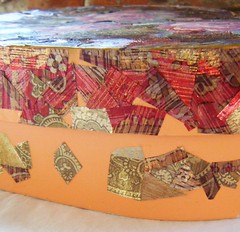
Heart Shaped Box, Closeup of Side as of June 12

Heart Shaped Box, Closeup of Side as of June 12 (Originally uploaded by randubnick)

Life has been pretty hectic lately, but last week I did get a chance to work on this project at the studio for a while. I am covering a heart-shaped box with collage and decoupage designs made with printed metallic ribbons. (The box originally held a Mother's Day gift from my daughter.) This photo shows the box from the side. The top of the box is just about finished. I am now working on the side of the box lid, which I am covering in ribbon that is predominantly red, with a little bit of gold. I have also started working on the side of the bottom part of the box, which I am covering in ribbon that is mostly gold, with an occasional touch of red.

Tuesday, June 17, 2008

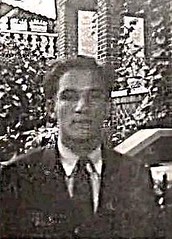
Hy 1937 (Rescued Photo Posterized with Color Set)

Hy 1937 (Rescued Photo Posterized with Color Set)

Yesterday and the day before, I posted two versions of a snapshot of my father. The first version was the photo cropped, with scratches removed and focus sharpened on the face. The second version was a posterized version of the rescued photo. This is the third version, the rescued photo posterized in Painter IX with a color set. The color set added some green to the ivy, and some additional color variation to the foreground. But I also decided to use a color overlay to add muted rose tones to the face and to the brick. Although the first version is my sentimental favorite because it is the clearest picture of my dad's face, I think this version is the most successful visually.

Monday, June 16, 2008

Hy 1937 (Rescued Photo Posterized)

Hy 1937 (Rescued Photo Posterized) Originally uploaded by randubnick

Yesterday I posted a rescued snapshot of my dad, taken as a young man, back in 1937. I used Painter IX to fix some scratches, improve the composition, and correct the focus. (My father's face was out of focus, but the background focus was quite sharp.) I liked the composition better and it was easier to recognize my dad's face, and for that reason, the version I posted yesterday is my favorite. But I also thought the photo might look good posterized (in Painter IX), so I tried it and here is the result. Even though the photo was black and white, the posterizing introduced some colors into the image. I liked the effect. Then I decided to take it further and try posterizing with a color set, and I will post the result tomorrow.

Sunday, June 15, 2008

Hy 1937 (Rescued Photo)


Hy 1937 (Rescued Photo) Originally uploaded by randubnick

This image started as a snapshot of my dad. Several years after he died, one of my aunts gave me a box of photos taken of him as a teenager or young man, and a few taken when he was a boy. Most of them were photos that I was seeing for the first time, and I was very glad to have them. Tonight I was looking through them (because it is Father's Day) and came across a snapshot of my dad as a young man, standing in front of a brick building with an ivy-covered porch. The words "Hy 1937" are written on the back, several years before he enlisted and was stationed in Colorado, where he met and married my mother. From the looks of the building, I would guess this was taken in Brooklyn, where he was born and raised. I really liked the snapshot, but it was scratched up, and although the background was in focus,the face was not. I decided to try to rescue the snapshot, so I scanned it into the computer and opened it in Painter IX. First I cleaned up the scratches, and then started working with the focus, selecting and sharpening individual areas. The result doesn't have the smooth finish of a "perfect photo", but I like it, mostly because I can see my dad's face much more clearly, but also because I like the rough look of the image. Finally, I cropped the image to get the composition I wanted, and here is the rescued snapshot. But then I began to wonder how this image would look posterized, so I tried it, and I will post the result tomorrow. To be continued. . . .
Saturday, June 14, 2008

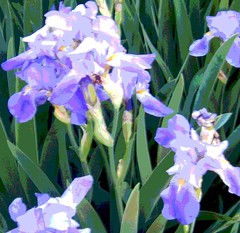
Closeup of Purple Iris (Posterized Photo)

Closeup of Purple Iris (Posterized Photo) Originally uploaded by randubnick

The other day when I was taking a morning walk here in Beverly, I saw purple iris, the very same color as those that bordered the driveway back in Lawrence, Kansas. So I decided to take a couple of photos with my digital camera. Tonight, I cropped this image out of one of the photos, and then posterized it with Painter IX.

Friday, June 13, 2008

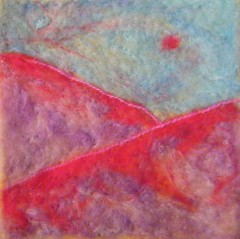
Two Mountains (Needle Felting)

Two Mountains (Needle Felting) Originally uploaded by randubnick

On Monday I took my first class in fiber arts at Red Brick, and learned to make free lace (described in yesterday's post). I also learned how to do needle felting, which is working wool fleece into a felt backing with a very sharp needle. The photo is of the needle felting project that I made Monday night. I used a piece of yellow felt, about five inches square. I didn't like the color, but that was what was available. I didn't think I was going to like the process or the project, but I put a little bit of red fleece on the felt and got started. It suggested the sun, so I started creating the outlines of mountains. I began to approach the process as if I were painting, using different colors of fleece in transparent layers, and mixing the colors on the felt as if it were canvas. I got so involved in this that I didn't perceive time passing. The instructor mentioned that the process worked with yarn as well as fleece, so I outlined the mountain shapes with a little pink yarn. I covered almost all the yellow felt, but it peeks out here and there, and now I like the way it breaks through the fleece, adding complexity to the colors and perhaps suggesting a little sunlight on the mountains.

Thursday, June 12, 2008

Free Lace Scarf

Free Lace Scarf (Originally uploaded by randubnick)

This is the free lace scarf that I made Monday night in the fiber arts class at Red Brick. This is the third of three photos that I took of the process. (See posts for June 10 and 11.) It was great to watch the pattern of ribbons on cellulose paper turn into lace as the backing dissolved in water. And it was also fun to see the two-dimensional pattern of ribbons take on the three-dimensional properties of fabric. This photo shows how the scarf drapes and moves in three dimensions. Well, the scarf is basically finished, though I plan to add more fringe to the ends. After that, I may post another photo to show how the scarf looks when it is worn.

Wednesday, June 11, 2008

Free Lace Scarf (Drying on Rack)

Free Lace Scarf (Drying on Rack) Originally uploaded by randubnick

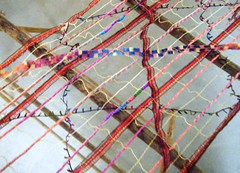
I am taking a fiber arts class at Red Brick Studios, and last night we learned to make free lace. This is free-form lace made by arranging ribbon and yarn on sticky cellulose paper, covering with a layer of clear cellulose, and stitching a grid through the layers. The cellulose layers dissolve when immersed in water, leaving just the lace. Last night I posted a photo of my project with the ribbons attached to the cellulose paper. The photo that I am posting tonight is also from last night's class, and shows my free lace scarf, drying on a wooden rack.

Tuesday, June 10, 2008

Free Lace Scarf (Ribbons on Backing)


Free Lace Scarf (Ribbons on Backing) Originally uploaded by randubnick

I am taking a fiber arts class at Red Brick, something new for me, which is exciting but always a little scary. (Back in college, one of my all-time favorite painting teachers once said, "Randi, you are just not three-dimensional" and I fear he was right! But I managed to get through a required sculpture course with my sewing machine.) Anyway, the list of processes covered in the fiber arts class looked interesting, so I signed up. Last night we learned to make free lace, and I decided to make a lace scarf. The first step is to create a design with ribbons and yarn on extremely sticky paper. I used red and multicolored ribbons and yarn to make a geometric design, and the photo shows the design after I had stuck down all the ribbons. After that, the next step is to cover the whole thing with a piece of clear material that looks and behaves like Saran Wrap. This is NOT the sort of thing I am good at, and at this point, I felt like Lucille Ball doing fiber arts, but I managed to get the piece of film on straight. Then a grid is stitched over the whole piece, which the instructor did for us last night with a portable sewing machine. Once the sewing is finished, the whole thing goes into a tray of water. The clear material on top and the paper backing on the bottom are made of some kind of starch, and they dissolve in the water, leaving the lace! Tomorrow I will post a photo of the result. . . .

Monday, June 09, 2008

Colorado Landscape (Near Pinon) Posterized


Colorado Landscape (Near Pinon), Posterized Originally uploaded by randubnick

This image began as a photo that I took a few years ago from the passenger's seat of a friend's car, as we headed back to Pueblo, where I grew up. I came across the photo tonight, cropped it, and then posterized it in Painter IX. To be more specific about the location, this is close to Pinon, Colorado which is about 15 minutes away from Pueblo. This is the landscape of home, the view out the car window on every road trip north to Colorado Springs, Denver, or Boulder. It has been quite a while since the landscape around Pueblo was part of my everyday life (forty years, to be precise) but on visits home I have come to appreciate it more. The side of the road at Pinon was a destination we all joked about as teenagers. But this landscape has a stark beauty that stays with me, along with wonderful memories of Colorado.

Sunday, June 08, 2008

Boston Blues


Boston Blues (Originally uploaded by randubnick)

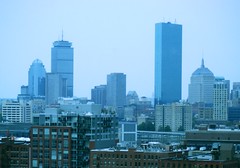
A friend from Northern Ireland has been visiting the U.S. recently, providing a great excuse for a bit of local sightseeing. This is a photo from last week's outing, a trip to see the new ICA (Institute for Contemporary Art) on the Boston waterfront. But the first stop was our friend's hotel, to see the view that he was so excited about. He was staying at the Westin Boston Waterfront, on the 13th floor, which is where I took this photo. He said the view was even better after dark. (I should mention that he is a big fan of "Boston Legal"). The view was great, so I took some pictures through the window. Well, the weather was unusual last weekend, cool, very overcast, and threatening rain. The skyline was a combination of muted grays when I took the original photo. But when I had the image in the computer, something mysterious happened while I was trying to adjust the contrast or some such and it went blue! My theory is that this happened because I took the photo through the window, and perhaps the glass was polarized or treated in some other way. In any case, I liked the effect, so here is the image, Boston in blue.

Saturday, June 07, 2008

Sunshine and Pink Peonies (Digitally Edited Photo)

Sunshine and Pink Peonies (Digitally Edited Photo) Originally uploaded by randubnick

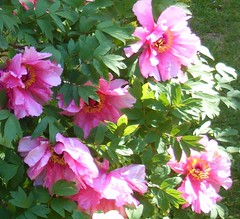
This photo is from an afternoon walk at Long Hill Gardens in Beverly, at the tail end of May. The peonies were blooming all over the place, and so big that you would think you were dreaming! They were blooming in many colors, but I especially liked the pink ones, maybe because when I lived in Lawrence, Kansas, I had pink peonies in my backyard. In any case, it was a lovely afternoon to be at Long Hill Gardens. I liked the way the sunlight was playing on the flowers, so I took some pictures, and this image is cropped from one of the best photos. Tonight just as I was ready to post it, I noticed a pesky string of tree pollon hanging on one of the blossoms. (That stuff is everywhere and I am not surprised it worked its way into my photos.) So I opened the image in Painter IX and brushed off the pollon with a little digital pastel. But apart from that, I did not change the image. The color is just as it came out of the camera, and I did nothing to enhance the amazing afternoon light.

Thursday, June 05, 2008

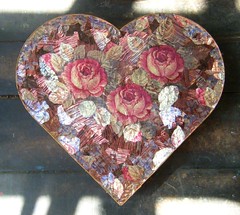
Heart Shaped Box, Side View with Tray (As of June 2)


Heart Shaped Box (Side View with Tray, As of June 2) Originally uploaded by randubnick

Yesterday's photo was of this heart-shaped box, seen from above. Today I am posting the side view. I am covering all of the surfaces of this box with collage and decoupage, made from metallic ribbons printed with paisley and floral patterns. (In the background of this photo is a corner of another such project that I did last year, a collaged styrofoam tray. The posts for that project can be found by searching for "Ribbon Roses".) Well, at this point the top surface of the box is basically finished; now I am working on the sides. I am using red and gold paisley print for the top edge of the lid. I will use mostly gold, with maybe an occasional touch of red, on the sides of the box itself. I chose gold rather than a pattern or color because the sides of the box will need to work with whatever patterns are on the inside of the box as well as on the bottom. (I don't know what those will be yet. I am making this up as I go along!) Apart from the acrylic medium and a little gold paint for the trim, all of the materials for this project are recycled. The box was the container for a Mother's Day gift from my daughter, and the ribbons were in a batch of art and craft materials that a friend was giving away.

Wednesday, June 04, 2008

Heart Shaped Box (Collage Day 8)

Heart Shaped Box (Collage Day 8) Originally uploaded by randubnick

On Monday morning, I went back to the studio to work on this project. The heart-shaped box once held a gift from my daughter. I am making it into a keepsake box, decorated with a collage and decoupage design made with printed metallic ribbons. I arrived at the studio excited about my idea for the sides of the box, but I forced myself to finish the top first. I had to find the right pieces of brown ribbon to cover any remaining gaps. Now I think the top is basically finished. This is how it looked in the morning sun. I did go on to work on the sides of the box and tomorrow I will post a photo taken from the side.

Tuesday, June 03, 2008

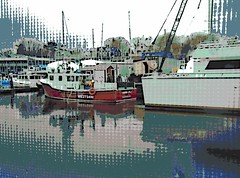
Red Boat at Kennebunkport (Digital Woodcut with Color Set)


Red Boat at Kennebunkport (Digital Woodcut with Color Set) Originally uploaded by randubnick

Here is one more go at the image of a red boat seen through a screened window of a Kennebunkport restaurant. Yesterday I posted a digital woodcut of the image, created with Painter IX. This image is also a digital woodcut created with Painter IX, but this time I used a color set. I also used a color overlay and the "magic wand" tool to get the teal green color at the bottom and sides of the image. While I was at it, I used some digital pastel to cover up a pesky advertisement on one of the boats. This image is far from where I began when I saw the boat through the window at Kennebunkport, but this is the version of the image that I like best.

Monday, June 02, 2008

Red Boat at Kennebunkport (Digital Woodcut)

Red Boat at Kennebunkport (Digital Woodcut) Originally uploaded by randubnick

Yesterday I posted a photo of a little red boat seen through a windowscreen at a Kennebunkport restaurant up in Maine. This is a digital woodcut made from that photo using Painter IX's software. The colors are simplified, and the textures are enhanced, including the texture of the window screen.

Sunday, June 01, 2008

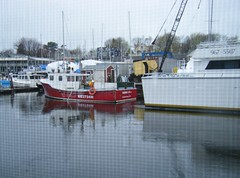
Red Boat at Kennebunkport


Red Boat at Kennebunkport (Originally uploaded by randubnick)

A friend from Northern Ireland has been visiting the States, which has been a lot of fun and a great excuse to fit in a little local sight-seeing here and there. One rainy day in mid-May, we headed up to Kennebunkport, Maine, to have lunch. I took this photo from a little restaurant by the water. It was raining and still cold, with trees just barely beginning to leaf out. The highlight of lunch was Maine blueberry pie and the view! I loved the red boat and tried to get some quick photos. This is the best picture I was able to get -- through a window with a screen! Not ideal, but I decided that the texture of the window screen offered some interesting possibilities. To be continued. . .