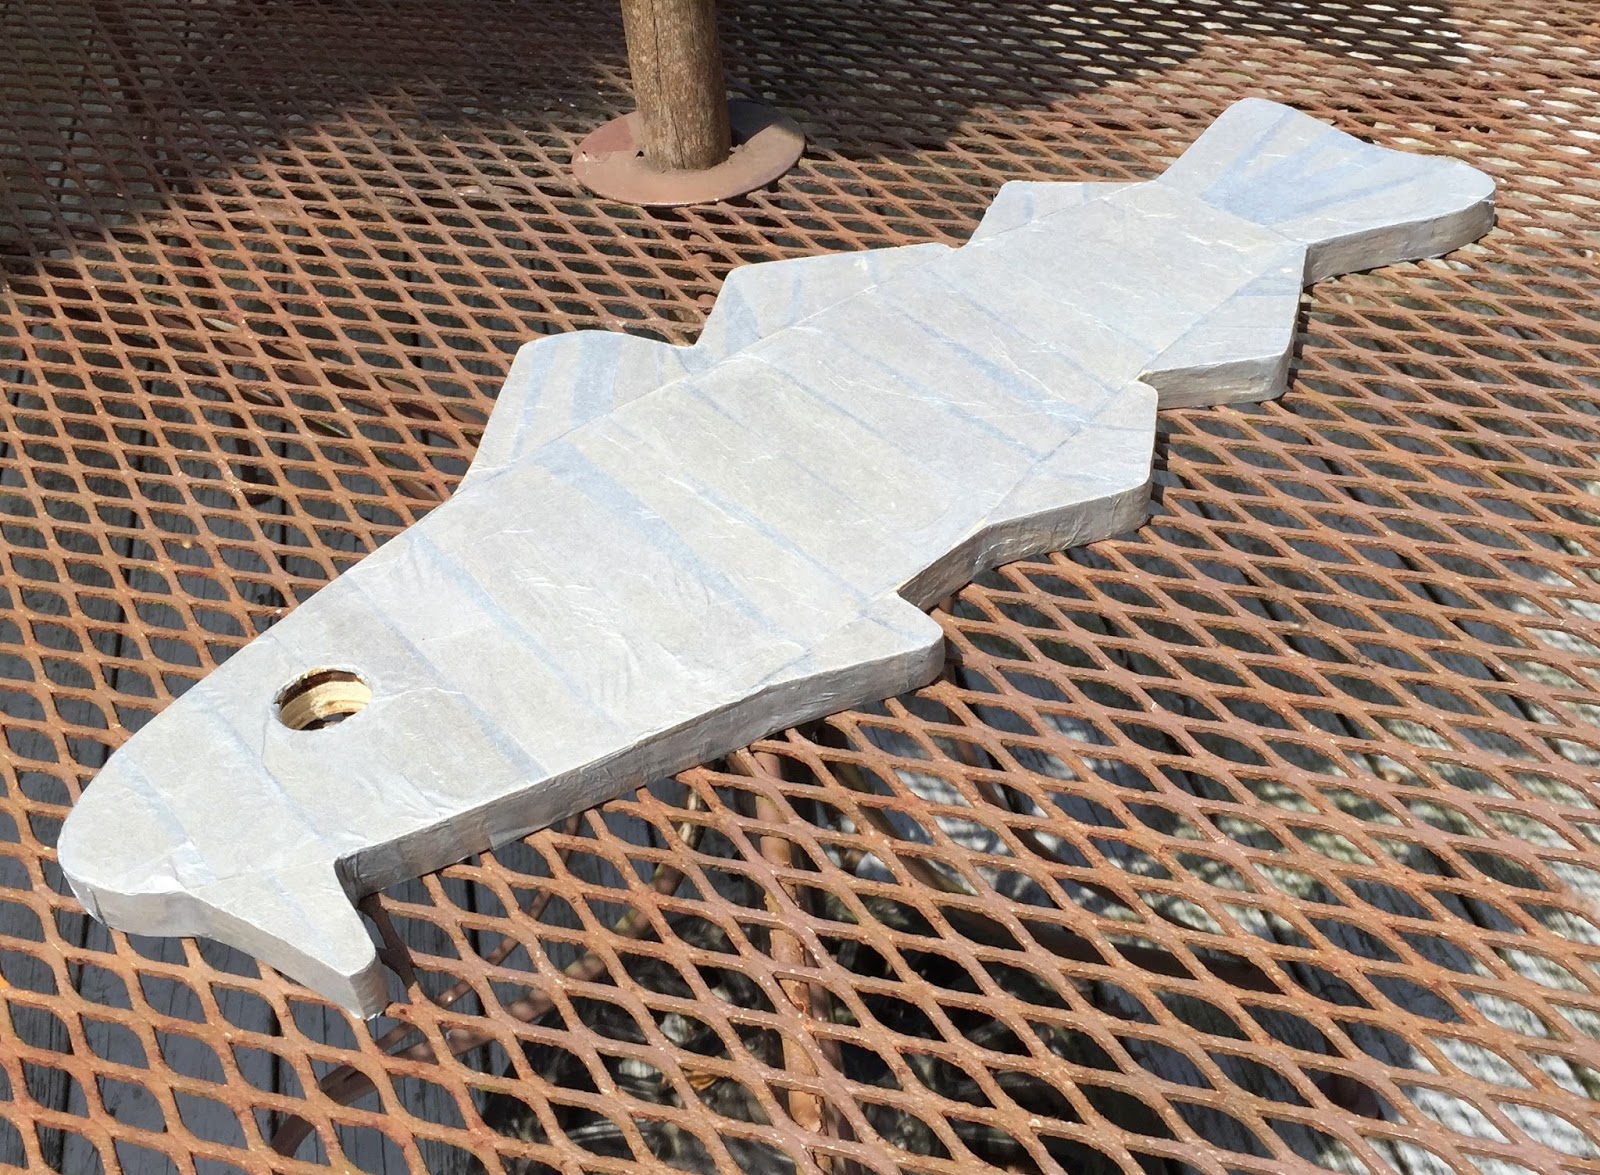
Wednesday, May 13, 2015

Codfish Project as of May 9, 2015


Here is my codfish project as of May 9, 2015. (Alternative title: Codfish on Studio Wall.) Fifty area artists have been asked to decorate wooden codfish cutouts for the Marblehead Arts Festival. This is mine, as it looked on May 9, 2015. At this point, I was doing a lot of cleanup work, making sure everything is pasted down, trying to get the surface as smooth as possible, etc. This part is tedious and not visually interesting. But I decided to have some fun and hang my codfish on the studio wall, and this is how it looked.

Tuesday, May 12, 2015

Codfish Project with Woodblock Trials May 8, 2015


Here is another picture of my codfish project on the easel, as it looked on May 8, 2015. This time I photographed it with the two woodblocks that served as trial runs. I am decorating this wooden fish cutout for the Marblehead Arts Festival. (Fifty area artists are decorating these fish cutouts, which will be on display in Marblehead and then auctioned off.) I have continued to work on my codfish over the past few days, finishing and fine-tuning it. But the basic idea is all there, and it is interesting to see how the idea evolved from trial run to actual.

Monday, May 11, 2015

Codfish Project as of May 8, 2015


This is my codfish project as it looked on May 8th. (Alternate title: Codfish on the Easel.) I am decorating this wooden cutout of a codfish for the Marblehead Arts Fest. At this point, I had finished the mouth with some blue tissue paper, and added more gold to the fins and tail. Still to go: finishing work, neatening things up, pasting things down. I am thinking about putting some gold accents on the sides of the piece. And if there is time, I might decide to paint the back of the cutout with gold paint.

Sunday, May 10, 2015

In the Wedding Party (Posterized Photo)


This is a photo of my mom at my aunt's wedding. My mother was matron-of-honor. Last night I scanned a black-and-white version of the photo into my computer and used Painter to add some soft color and then posterized it. (I already knew the colors of the dress because I once wore it to dress up as Queen Esther for Purim. But I referred to a tinted version of this for the color of the roses.) I think this is a beautiful photo of my mother, and I believe my father thought so too. As for my mother, she didn't have a clue that she was beautiful.


Saturday, May 09, 2015

Detail of Codfish Project as of May 7, 2015


Here is a closeup of my codfish project as it looked on May 7, 2015. (I am decorating a wooden codfish cutout for the Marblehead Arts Fest.) In this view, you can see the markings of the fish and gold accents I added. I used a small piece of netting and gold paint to simulate the pattern of scales. I dipped the netting in the paint, then made a little print by putting it on the surface of the fish and rolling a pencil over it. That worked, but sometimes left only a partial print, but I used a brush to add the "missing" marks.

Friday, May 08, 2015

Codfish Project as of May 7, 2015


This is my codfish project as it looked yesterday morning after I worked on it. (Alternate title: Codfish on the Back Porch.) I am decorating this wooden fish cutout for the Marblehead Arts Festival. (Fifty area artists are doing this; the codfish will be displayed and then auctioned off this summer.) Yesterday I added gold accents to the fins. I also suggested the pattern of scales with gold paint and a piece of net. And I finally decided to give this poor codfish a mouth. To be continued. . . .

Thursday, May 07, 2015

Early Mother's Day Bouquet


Mother's Day started early! This morning I received a beautiful bouquet. I love the bright colors, hot pink and bright red flowers. I took some pictures today but when I got the images into the computer tonight, I could see some problems with the exposure, too many shadows. So I did a little editing in iPhoto and the colors began to pop!

Wednesday, May 06, 2015

Codfish Project as of May 6, 2015


Here is my codfish as it looked this morning. (Alternate title: Codfish on Flagstone.) This is the wooden cutout of a codfish that I am decorating for the Marblehead Arts Festival. (Fifty area artists have been given this assignment, and an identical wooden cutout to start with.) Last night I cut out and pasted in the dark blue circles for the markings. This morning, I took my my codfish outside and photographed it in on the flagstone path, with sunlight coming through the chain link fence. To finish this project, I plan to add gold accents on the fins and on the body of the fish, to suggest scales.

Tuesday, May 05, 2015

Codfish Project as of May 4, 2015


Here is my codfish project as it looked yesterday. (Alternate title: Codfish on Hardwood Floor. ) I am decorating this wooden codfish for the Marblehead Arts Fest. (Fifty area artists are decorating the same fish cutout.) Yesterday it was time to start pasting down bright pink circles. I had already done a "digital dress rehearsal" to work out the placement: I made digital "markings" on a photo of my fish, using Painter's digital pastel. (See yesterday's post.) Even though I was using my digital trial run as a guide, it made me nervous to start pasting the pieces down. But I am happy with the way the placement. To be continued. . . .

Monday, May 04, 2015

Codfish Project (Digital Dress Rehearsal) May 1, 2015


I am decorating a wooden codfish cutout, to be donated to the Marblehead Arts Fest. (Fifty local artists are doing this.) I am using collaged tissue paper to decorate my fish, which will be silver with fuchsia and blue markings, and gold accents to suggest scales. By May 1, I had finished covering the wooden fish cutout with silver paper. I decided to do a digital dress rehearsal to figure out the placement of the pink and blue markings before trying it with "the real thing." So I opened a photo of my codfish in Painter and used some digital pastel to work out where I want the markings to be. Even though the colors are softer in this digital version, this is the general idea. I also tried out some gold accents on the fins.

Sunday, May 03, 2015

Codfish Project as of May 1, 2015


This is my codfish project as it looked on May 1, 2015. (Alternate title: Codfish on Umbrella Table.) I am decorating this wooden codfish for the Marblehead Arts Festival. Fifty artists were given the same wooden fish cutout and their codfish creations will be displayed in Marblehead and then auctioned off. I have been covering my fish with silver paper, and at the time I took this photo, had finally finished putting the silver paper around the edges of the cutout. To be continued. . . .

Saturday, May 02, 2015

Codfish Project as of April 30, 2015


Here is my codfish-in-progress as it looked on April 30, 2015. (Alternate title: Codfish on the Carpet.) I am decorating this wooden codfish for the Marblehead Arts Festival. I am part of a group of 50 local artists who have been given a wooden codfish form to decorate. These will be on display in Marblehead and then auctioned off this summer. When I took this photo, I had finally finished covering the front of the fish with silver tissue paper, although I still needed to cover the sides of the form. To be continued. . . .

Friday, May 01, 2015

On the Danvers-Wenham Swamp Walk


Last weekend's adventure was a trip to the Danvers-Wenham Swampwalk. You can walk through a swamp on a wooden boardwalk. It was a lot of fun. I took several pictures, but I think this is the best one. The reflections of blue sky and clouds just below me were a bit disconcerting, and made me feel like I was walking into the sky. I tried to crop this photo to give viewers a similar sensation.

Thursday, April 30, 2015

Codfish Project as of April 29, 2015


Here's my codfish project as it looked yesterday. (Alternate title: Codfish with Drawing Board). I am decorating this wooden codfish for the Marblehead Arts Fest. The same wooden fish cut-out was furnished to 50 area artists to decorate. All the decorated codfish will be displayed in Marblehead and then auctioned off. My fish is going to be silver with markings in hot pink and dark blue, with painted gold accents to suggest scales. I am working with tissue paper and acrylic gel medium. I am still working on the first and most tedious step, covering the fish with a base of silver tissue paper, pieced together to suggest the form of the fish (body, fins, tail). You can't tell by the photo, but I am also applying tissue paper to the sides of the form.

Wednesday, April 29, 2015

Codfish Project (Trial Run for Surface Texture) April 25, 2015


This is part of my prep work for a wooden codfish that I am decorating for the Marblehead Arts Festival. (There will be fifty of these wooden codfish, each decorated by a local artist. The codfish will be on display in Marblehead and auctioned off this summer.) I am using tissue paper to create a silver codfish with pink and blue markings. I also want to suggest scales with gold accents, but have been struggling with how to do it. I tried painting through a net, but the method was unreliable. I even had the idea of painting the net itself and pasting pieces of it into the surface. But I thought it was a bit too literal, and besides, the net was casting a bit of shadow on the surface. So the other day, I gave it another try, on a piece of computer paper and came up with a method that works: dipping the net in the paint, pressing it in place, and rolling over the net with the handle of a brush. Here is my trial run and this is how it looks.

Tuesday, April 28, 2015

Codfish Project as of April 25, 2015


I was asked to decorate this wooden codfish and donate it to the Marblehead Art Fest. Fifty local artists are doing this. The decorated codfish will be on display in Marblehead and then auctioned off in July. This is how my codfish looked on April 25, 2015. It is about a yard long and hard to photograph, so I put it on the sofa. I thought about calling this "Cod on the Couch" and I think it would be fun to photograph this thing in different places. Anyway, I am covering the wooden form with strips of silver tissue paper. You can see that it catches the light. I plan to decorate it with bright pink and dark blue markings made of tissue paper, with gold accents to suggest scales.

Monday, April 27, 2015

Cold Spring Day (Korean Rhododendrons)


We are having a string of cold spring days, but the Korean rhododendron in my yard is blooming anyway. Here is a picture I took of it.

Sunday, April 26, 2015

Codfish Project as of April 24, 2015


This is the wooden codfish that I am decorating for the Marblehead Arts Festival as it looked on Friday. Although there were still decisions left to make about the details project, I was ready to get started. I drew in lines for the body of the fish, and then started cutting and pasting strips of silver tissue paper. This doesn't look like much yet (or if anything, it looks like duct tape!), but the silver paper does reflects the light. And I know from my trial runs that the markings in bright colors and the gold accents will make a difference.

Saturday, April 25, 2015

Codfish Project (Woodblock Trial with Net) April 22, 2015


This is a continuation of my prep work for my codfish project. (Along with 49 other local artists, I am decorating a wooden fish to donate to the Marblehead Art Fest.) I am trying out my ideas on scrap lumber before working on the actual wooden fish cutout. I have been trying to create the illusion of scales by painting through a net with gold paint. But the result wasn't as reliable as it needed to be. After a number of tries, the net itself had been painted gold. That gave me the idea of actually using gold painted netting as an element of the collage. This is a trial run to see how that would look. To be continued. . . .

Friday, April 24, 2015

Codfish Project (Woodblock Trial #2) April 22, 2015


This is more prep work for my codfish project. Fifty local artists are decorating wooden codfish to be displayed in Marblehead and then auctioned for the Marblehead Arts Fest this summer. Rather than risk having to do "overs" on my big wooden codfish, I decided to do some trial runs on small pieces of scrap lumber. For my first woodblock trial, I tried out six different ways to do the markings on the fish. I chose one of them and in this trial run, I am trying to see how my choice is going to look. What you see here is silver tissue paper collaged to the woodblock, with markings also made of tissue paper. I also tried adding gold acrylic accents, painted through a net to look like scales. So far, I haven't been able to get that to work the way I would like, at least not consistently. And that could be a problem, because that would be the final step in the process. But I still like the touches of gold paint because help to suggest the iridescence of the skin. To be continued. . .

Thursday, April 23, 2015

Codfish Project (Woodblock Trial #1) April 18, 2015


I am going to decorate a big wooden codfish to donate to the Marblehead Arts Festival. Fifty local artists are doing this, and the decorated fish will be displayed in Marblehead before they are auctioned off. I picked up the wooden fish last week, and have been thinking hard about codfish. After looking at photos of codfish, I decided to do a very loose rendition of the markings on the codfish, but it bright colors. I decided to do this with collage, using layers of tissue paper and gel medium. And I knew I wanted to used silver paper for the background, with bright pink and dark blue. I decided to try out my ideas on a piece of scrap lumber. (This wasn't going to be like working on a piece of paper. "Can I have another fish, please?" wouldn't be an option.) So I did six different trials on my block of wood, with different sizes and proportions and positions of pink and blue. I also decided to try adding gold accents, painted through a net to suggest scales. It was hard to get the result I wanted, but sometimes it worked. Anyway, this was a helpful exercise. After spending a little time looking at these six trial runs, I had a clearer idea of what to do. To be continued. . .

Wednesday, April 22, 2015

Codfish Project Unwrapped


This is a wooden codfish that I am going to decorate for the Marblehead Festival of Arts 50th Anniversary Celebration.  I am among fifty local artists who are going to decorate one of these wooden fish, which will then be displayed in Marblehead, MA, and auctioned off.  Last week I drove over to Marblehead to pick up my  wooden codfish. It  was wrapped in plastic when I picked it up. As I was unwrapping it back home, I remembered that as a kid, I was used to seeing fresh fish wrapped in newspaper.  So before I started decorating this fish, I decided to kick off this project by taking a photo of my wooden fish against a backdrop of newspapers. 

Tuesday, April 21, 2015

Violas


It's been a long winter, here north of Boston. But most of the snow is gone, and displays of flowers are beginning to appear outdoors at plant stores and in front of supermarkets. I took this photo of some violas on a recent trip to a plant store. Tonight I cropped this image of the one of the best photos. I love violas; they seem to turn up just when I have given up any hope of warm weather. They make me smile. And though they might not look like it, they are actually very sturdy.

Monday, April 20, 2015

Mom and Me (Photo on Pink Board)


I made this over the weekend while I was working on another project (my decoupage box). This is a black and white photographic image on a pink plaque with jute. This is only about three inches square, designed to be a Christmas ornament, but it can also be hung on the wall. (With a lot of them, you can make a family tree.) I painted the wood a soft pink, and wanted the jute to be gray with a pink cast, as a background for the black and white photo.

Sunday, April 19, 2015

Decoupage Box (Mom Reading a Letter)


Yesterday I painted the outside of my decoupage box, so now it is finished, although I will probably add another coat of medium to seal it. The image is a photo of my mom, from a snapshot that I colorized a few years ago. This can be hung on the wall, or placed on a bookshelf vertically, but can also be used as a little box or tray. I made this for myself, but I enjoy making these things for other people, too.

Saturday, April 18, 2015

Decoupage Box (Mom Reading a Letter) As of April 16, 2015


I have been working on this keepsake box, decorated with an old snapshot of my mom that I colorized using Painter. Once I had secured the photo to the inside of the box, I wanted to add a simple border. I decided to create a border with narrow gift-wrap ribbon. (When I was a small, I liked to watch my mother wrap presents for family parties, and I loved to watch her make the ribbon curl.) It was easy to make the border out of the ribbon, and it added a little bit of texture to the box. One last step: painting the outside of the box. To be continued. . . .

Friday, April 17, 2015

Decoupage Box (Mom Reading a Letter) as of April 14, 2015


Here is my decoupage box as it looked on April 14, 2015. The image is a picture of my mother reading a letter. This is colorized and posterized photo that I first posted here on November 2, 2012. The original version of the image was an old black and white snapshot that my aunt sent to me. I really liked the picture of my mother sitting in a chair and reading a letter. But the snapshot was only about 2" x 3" and it was out of focus and a bit scratched up. So back in 2012, I scanned it into my computer, retouched and cropped it in iPhoto and then sharpened the focus and added color overlays in Painter. This spring, when I decided to make a decoupage box, I came across the image again, and decided to use it. When I painted the inside of the box, I was trying to match the red of the chair in the colorized photo. To add this image to the box, I printed out a copy of it from the computer and used acrylic medium to glue it down. I was happy with the result, but thought it might look good with a border. To be continued. . . .

Thursday, April 16, 2015

Decoupage Box (Mom Reading a Letter) as of April 12, 2015


This looks like a pretty minimalist post, but this is just the first step of this project. I am going to use this box for a decoupage project using a family photo. The image is going to be a rescued and colorized snapshot of my mom reading a letter, back in the 1940s. The first step was to paint the inside of the box. I am using transparent acrylic paint. To get the color I was after, I applied three layers: fuchsia, blue-violet, and red.

Wednesday, April 15, 2015

Four Geese with Soccer Ball


This year I have been tutoring at a local school two mornings a week. Even though the school is just a short drive from my house, I still find it a challenge to get there on time for early morning sessions. So I usually park, lock the car, and rush straight to the classroom. But one morning in early April, I locked the car, turned around, and saw this scene, a soccer ball framed up by four geese on the playing field. It made me smile, so I stopped in my tracks and took a quick picture with my iPhone. I tried to zoom in, but even so the geese didn't show up very well in the original photo. So tonight I cropped the image, and made some adjustments in Painter (posterizing and a bit of woodcut), and finished up with some more fine-tuning and a final crop in iPhoto.

Tuesday, April 14, 2015

Red Bird (Digital Woodcut)


A little over a week ago (April 6), I was standing in the kitchen when I saw a bright red bird sitting in the tree outside the window. I loved the way it looked against my neighbors' yellow house. I grabbed my iPhone and took a quick picture through the blinds before the bird flew away. I didn't get a chance to zoom in or focus. So of course, when I cropped the image to emphasize the bird, the focus was too soft. So I opened the image in Painter and posterized it. Then I applied a woodcut effect to the posterized version (instead of the original) because it is possible to get brighter colors that way.

Monday, April 13, 2015

Low Tide at the Beach


This weekend, we finally had good weather for walking on the beach, so we went to Lynch Park, a waterfront park here in Beverly, MA. It was low tide, revealing sand that is usually covered by water. I liked the patterns in the sand, so I started taking pictures. I think this is the best one.

Sunday, April 12, 2015

The Wedding Cake (Digital Woodcut)


Last week I posted a black and white version of this photo of my parents at their wedding reception (April 4, 1943). My cousin David gave me an 8 x 10 version of this photo in September when I was visiting New York City. I wanted to add color, but decided to talk to my aunt first to see if she what she could tell me about my mother's outfit. My aunt confirmed that this was my mom's "going-away outfit" and that my mom had changed from the pink dress she wore to the ceremony. I learned that the suit would have been a neutral color (gray or beige) due to war time constraints. My aunt wasn't sure of the color of the blouse, but thought it was a red color. I had been thinking of going with teal blue for the blouse, but after talking to my aunt, I decided on darker pink or plum, and a gray suit with a blue cast. (Of course, when I added posterizing and woodcut effects, the colors changed anyway.) Then the problem was to integrate the color scheme with my dad's uniform. I tried to use the 1940s print of the curtains to pull some of the colors together, and to create a bit of continuity between both parts of the background. It took several tries to come up with a solution, but I am happy with this one. The color scheme reminds me of the wall paper and drapes in my childhood home. (My aunt confirmed that both the ceremony and reception took place at the Vail Hotel in Pueblo, Colorado, and there were only 40 guests.) I really enjoyed spending time thinking about my mom and dad and their wedding and talking to my Aunt Edy about it.

Saturday, April 11, 2015

Matzah Roses with Matzah Borders


Passover is ending as of tonight.  Here is one last image that I put together, using all the "matzah" patterns that I made this week: my "Matzah Roses" bordered two matzah flower patterns and framed by matzah pattern.  (I created the patterns in Painter, and drew the flowers with  Painter's "pattern pen" loaded up with my matzah pattern.)    

Friday, April 10, 2015

Lotsa Happy Matzah Flowers


Some of the patterns that I have made in Painter have disappeared since my last software upgrade.  But as long as I still have the original image, I can recreate the pattern. So even though I used Painter to create this pattern today, I made the pattern by "capturing" an image that I created back in April, 2011: another digital drawing of flowers.  And like the other images I created this week, the drawing was made with Painter's pattern pen, loaded up with a matzah pattern.  So you can see matzah in every petal, leaf, and stem.

Thursday, April 09, 2015

Lots More Matzah Flowers


Yesterday's post was a little digital drawing of some flowers, created in my Painter program with the pattern pen, loaded up with the matzah pattern I made recently. I call these "Matzah Flowers" because every petal, stem, and leaf is made of matzah. I liked my matzah flowers well enough to use them to make another pattern as well, and so here are lots more matzah flowers, in a tiled arrangement.

Wednesday, April 08, 2015

Matzah Flowers


Here are some more matzah flowers that I made today, using Painter's "pattern pen" loaded up with the matzah pattern I made recently. (If you look closely, you can see matzah in the flower petals, centers, leaves and stems.) Once I had this image, I also used "capture pattern" to created a tiled pattern, which I plan to post here tomorrow.

Tuesday, April 07, 2015

Many Matzah Roses


Yesterday I posted an image of roses made of matzah. (I drew them on the computer with Painter's pattern pen, loaded up with my matzah pattern and if you look closely, you can see matzah in the flower petals and stems.) Today's post is more matzah roses, this time in a repeated tile pattern.

Monday, April 06, 2015

Four Matzah Roses


Yesterday I posted a pattern made from my photo of a piece of matzah. The image I am posting today is a picture of four roses, but if you look closely, you will see that the roses, stems, and leaves are all made of matzah. I drew them on the computer, using Painter's pattern pen, loaded up with my new matzah pattern.

Sunday, April 05, 2015

Matzah Squared


Earlier this week, I posted an image of a piece of matzah with a pink border. I used Painter to "capture" a pattern made of matzah, and here it is.

Saturday, April 04, 2015

Cutting the Wedding Cake


Last September, I took a trip to New York, and my cousin David hand delivered an 8 x 10 inch photo that he had been saving for me.  It was a picture of my parents cutting their wedding cake. I was so glad to have it! I had seen a much smaller version in my mother's album, but it was great to have the original version. Today I scanned the 8 x 10 photo into my computer and used iPhoto to crop out some distractions in the background (wood framing on the wall behind the bride, the edge of a wedding guest standing next to my dad).  The photo was in very good shape, but I used iPhoto's retouch tool to clean up some stray marks. I am planning to create a colorized/posterized version of this, so this edited version is the first step. I did a little searching in my mom's album and realized that this is not her wedding dress, which was a pink suit with ruffles on the color  and 3/4 sleeves.  (All the photos I have are black and white, but in her album, my mother wrote said, "The bride wore pink".) The two gardenias she is wearing look like the same flowers that were on the bible that she carried at the wedding. So she must have changed before the reception. This looks like a "going away outfit."   I am going to see if I can find out more about the color scheme, but meanwhile I am posting this today because my parents were married on April 3, 1943.

Friday, April 03, 2015

Matzo with Pink Border (Posterized Photo)


This is a new variation of an image that I have posted here before. Several years ago, I took a photo of a piece of matzo on a paper towel, and then posterized the image to emphasize the texture.  People seemed to like it.  I also used that photo to make a "matzo pattern" in Painter, which I used, in turn, to make other images with the pattern pen. Yesterday, I realized that my "matzo pattern" had disappeared. (I love Painter software, but my whenever I update it, I seem to lose all the patterns I have made.) So yesterday, I decided to start again. I opened my matzo photo in Painter, and this time, added pink to the border with a color overlay.  Then I created a new pattern with Painter's "capture pattern" function, and plan to use it later this week. Well, anyway, matzo is a classic, and I am going to use this image to send holiday wishes to friends and family.

Thursday, April 02, 2015

Spring Day, Massachusetts 2015


Here north of Boston, the weather is finally warm enough to take a walk near the water on a sunny day. But there is still snow on the ground. Yesterday I took some pictures, and tonight I edited one of the best photos to get this image. Although I took this photo on April 1, believe me, this is not a joke.

Wednesday, April 01, 2015

Fabric Flowers Tiled Pattern


Yesterday's post was an image of a little fabric flower that I had made recently at an event at the Peabody Essex Museum. I liked the flower and thought it had potential, so I took a photo of it, and cleaned up some rough edges in Painter. Then I applied a "digital woodcut" effect. I was happy with the result and decided to use the image in a pattern. So I used Painter's "capture pattern" function. Once I had made the pattern, I used it to create this image.

Tuesday, March 31, 2015

A Fabric Flower (Digital Woodcut)


I recently attended an event at the Peabody Essex Museum (in Salem, MA). The special Thursday nights there usually include several participatory arts and crafts events, and this time it was making fabric flowers. This is my idea of fun, so I made a couple of quick flowers.  This one was far from perfect, but I thought it had some possibilities, so I took a photo of it.  Today I used Painter to do some digital cleanup:  I used cut-and-paste to make the yarn center look neater, and cleaned up the edges with digital pastel. Then I applied a "digital woodcut effect".  After that, I did a final crop to get this composition.  I had been thinking that this would make a good pattern, so I grabbed the image with "capture pattern" .  I was very happy with the way the pattern turned out, and plan to post it here tomorrow.

Monday, March 30, 2015

Marigolds (Watercolor)


Some years ago, I used watercolors to paint orange marigolds that were in a planter on my deck. This painting has been in my studio for a while. I have been intending to photograph it and post in here, and today I finally did.


Sunday, March 29, 2015

Mom 1972 Polaroid (Digital Woodcut)


This image began with a Polaroid photo of my mom, taken by my dad in 1972. The photo is on the very first page of his album of Polaroid portraits. (Although I knew my father took a lot of pictures with his Polaroid back in the 1970s, I had no idea that this album existed until it arrived in the mail earlier this year.) Today I wanted a nice picture of my mother to publish along with her recipe for apple kugel on our food blog. I remembered this photo which I really liked because my father had captured her expression. But the lighting was a little harsh and I wanted to modify the composition. So I opened the image in Painter and used digital pastel to soften some of the effects of the camera flash. While I was at it, I added more color to the blouse. Then I applied Painter's digital woodcut effect, using trial and error to get the right amount of outline. Finally I did a close crop to get this composition. It was great to feel like I was collaborating with my father in creating this image, and I like to think that my camera-shy mom would have liked the result. (To see this picture, along with my mom's recipe and the illustration for it, go to https://seasoningforeverypalate.wordpress.com/2015/03/29/moms-passover-apple-kugel/)

Saturday, March 28, 2015

Still Life with Kugel (Illustration)


Today I used colored conte crayon to finish up this drawing. This is an illustration of a recipe for apple kugel, a dessert that my mother sometimes made on Passover. Tomorrow, I plan to post the recipe and this illustration on our food blog, seasoningforeverypalate.wordpress.com.

Friday, March 27, 2015

Still Life with Kugel (Illustration as of March 27, 2015)


I worked on this drawing this morning. This is soon to be an illustration for a recipe on our food blog (seasoningforeverypalate.wordpress.com). The recipe is for an apple kugel that my mother sometimes made for Passover. This morning, I continued to work out the color scheme, using colored pencils. But after about an hour, I decided that I needed to change course. I wasn't getting the kind of contrast that I needed, and more important, I was losing the outlines of the still life. So I tried adding colored conte crayon to the colored pencil, and that immediately solved the problems of color and contrast. Then I used dark blue fine-line marker to go over the outlines that I had drawn in with dark blue colored pencil. I was happy with that, too, especially the whimsical look of the outlined objects. It's a little risky to make that kind of change, but I have had good luck with the combination of marker and conte crayon in some other drawings. Suddenly everything seemed easier, and my recipe illustration was back on track. So now this is going to be a mixed media drawing. This is still a work in progress; I want to add more color and do some cleanup. But I am happy about this drawing and things should go faster now.

Thursday, March 26, 2015

Still Life with Kugel (Illustration as of March 26, 2015)


My current project is this drawing, which is going to serve as an illustration for a recipe on our food blog (seasoningforeverypalate.wordpress.com). This is a recipe for an apple kugel that my mother sometimes made for Passover. The biggest change I made today was to transform the can of pecans into a glass jar. I think that will improve the composition. And I had fun drawing the pecans. I also added detail to the product labels and am still trying to work out the color scheme.

Wednesday, March 25, 2015

Still Life with Kugel (Illustration as of March 25, 2015)


This morning I worked for a while on this drawing. This is going to be an illustration for a recipe for our food blog (seasoningforeverypalate.wordpress.com). The recipe is an apple kugel that my mother sometimes made at passover. This morning, I re-drew the apples, changing the placement. Then I made some changes to the lines and lettering. At this point, I am pretty happy with the composition, so I decided to use colored pencil to start figuring out the color scheme, beginning with objects whose color is predetermined (lemons, apples, metal objects, and the kugel itself.)