Tuesday, May 20, 2008

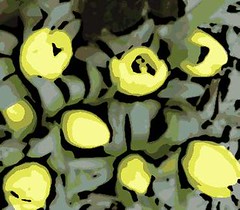
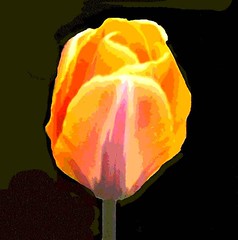
Tulip Top (Digitally Edited and Posterized)

Tulip Top (Digitally Edited and Posterized) Originally uploaded by randubnick

For the past few days, I have been posting photos of last week's excursion to Long Hill Gardens. The first photo that I took that day was of a single tulip with an orange and pink blossom. I thought the flower was amazing, but I didn't pay much attention to its surroundings. When I loaded the image into my computer, I noticed how distracting the background was. The leaves and stalk of the tulip were obscured by other plants. This wasn't a problem that I could solve with cut and paste or even a little retouching with digital pastel. But I really liked the tulip top, so today I tried to salvage the image. I cropped the image to focus on the top of the tulip, and then opened the image in Painter IX. I used opaque digital pastel to replace the foliage of the flowerbed with a simple dark background. Then I posterized the image, and here it is. I also made the image into a pattern, which I will post tomorrow.

Monday, May 19, 2008

Looking Up at Blossoming Tree (Posterized Photo)

Looking Up at Blossoming Tree (Posterized Photo) Originally uploaded by randubnick

Here is another view of blossoming trees. The original photo was in the same batch as yesterday's post, all taken during a trip last week to Long Hill Gardens here in Beverly, MA. The originally photo was a wider shot that showed more of the tree, but you couldn't see the detail very well. So I decided to show more by showing less, so cropped the photo, and then posterized it. Then I cropped it a second time to get the composition I wanted, making sure that I had a square format.

Sunday, May 18, 2008

Trees in Bloom at Long Hill

Trees in Bloom at Long Hill (Originally uploaded by randubnick)

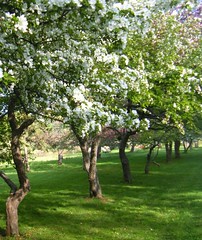
Here is another photo from a recent outing at Long Hill Gardens in Beverly, MA, where there are rows of blossoming trees lining the roadway. I was so excited to see the trees in bloom, and thought, as I always do, of A. E. Housman's poem, "Loveliest of Trees", and caught myself reciting some of the lines. It is a poem about cherry trees in bloom, but it is also about life and beauty and time. (I posted the entire poem here on April 30 of 2005, but it is found in many anthologies, and it is worth having a look.)

Saturday, May 17, 2008

Lilacs and Barn at Long Hill (Posterized)

Lilacs and Barn at Long Hill (Posterized) Originally uploaded by randubnick

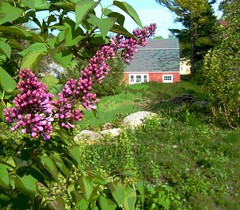
This is an image from a recent walk at Long Hill Gardens in Beverly. The lilacs are beginning to bloom, so I took some pictures. It was a windy afternoon, and the lilac branches were dancing in the wind. I liked the composition in this shot, with the barn in the background. But the foreground was distracting. I adjusted the focus in that area and then used a transparent color overlay, and it looked better. Because I was planning to posterize the image, I also used a color overlay to even out the color in the sky, to avoid getting bands of color that I didn't want. After I posterized the image, I cropped it to get the composition I wanted.

Friday, May 16, 2008

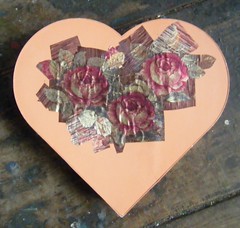
Heart Shaped Box, Edge of Top (As of May 15)


Heart Shaped Box, Edge of Top (As of May 15) Originally uploaded by randubnick

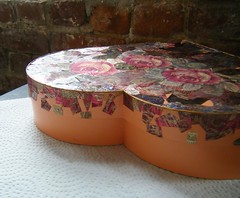
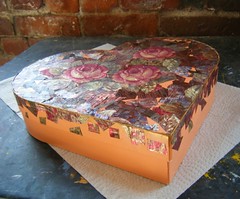
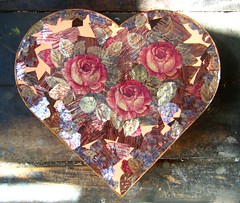
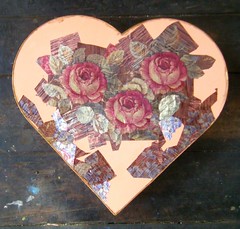
Yesterday I went to the studio to work on this project, a keepsake box. The heart shaped box once held a gift from my daughter, and I always kept the box. Now I am making it into a keepsake box. I am covering it with collage and decoupage designs made of printed metallic ribbon. Yesterday I worked on the top, adding some brown ribbon for the background (see yesterday's post). But while I was doing that, I stumbled across some more scraps of the red and gold paisley print that I am using on the edge of the box top, so I also worked on that. Here is a picture that shows a view of the edge.

Thursday, May 15, 2008

Heart Shaped Box (Collage Day 6)

Heart Shaped Box (Collage Day 6) Originally uploaded by randubnick

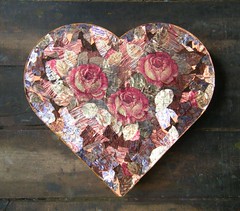
I finally had a chance to get back to the studio to work on this project today! This is a decoupage and collage project made from a box that originally held a Mother's Day gift from my daughter. I am using printed metallic ribbons and acrylic medium to create the designs. Today I worked on the top, mostly adding pieces of brown ribbon for the background, and occasionally adding a leaf or flower. I also worked on the side edges, which aren't visible here, but I will post a photo tomorrow.

Wednesday, May 14, 2008

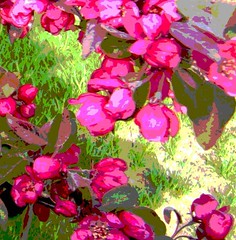
Closeup of Crab Apple Blossoms (Posterized)

Closeup of Crab Apple Blossoms (Posterized) Originally uploaded by randubnick

It has been a long wait for spring. But over the weekend, the crab apple trees finally decided to bloom, just in time for Mother's Day. I took some pictures while I was out walking. This image is a close-in crop from one of the photos that I took. I posterized the image in Painter IX to emphasize the excitement of seeing the brightly colored blossoms against the grass on a sunny day.

Tuesday, May 13, 2008

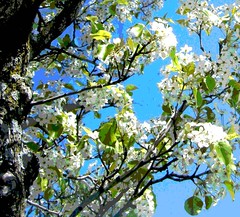
Closeup of Pear Blossoms (Digitally Edited and Posterized)

Closeup of Pear Blossoms (Digitally Edited and Posterized) Originally uploaded by randubnick

Time for one last look at the pear blossoms. This is the same image as yesterday, but cropped. I think the cropping makes the composition stronger, and it also makes it easier to see the effects of posterizing.

Monday, May 12, 2008

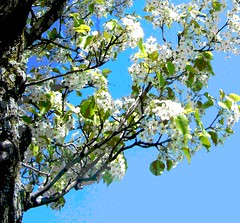
Under the Pear Blossoms (Digitally Edited and Posterized)

Under the Pear Blossoms (Digitally Edited and Posterized) Originally uploaded by randubnick

This is a posterized version of yesterday's image, a picture of a pear tree in bloom. Yesterday I used Painter IX's digital pastel to remove the tiny electric lights and wires (strung year-round on the trees in downtown Beverly). In this image, the posterizing is subtle, but you can see the color variations in the sky and in some of the leaves.

Sunday, May 11, 2008

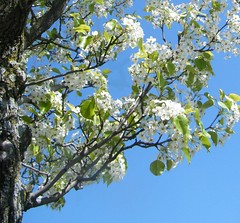
Under the Pear Blossoms (Digitally Edited Photo)

Under the Pear Blossoms (Digitally Edited Photo) Originally uploaded by randubnick

This morning, while waiting to get into a local restaurant, I took some photos of flowering pear trees in downtown Beverly. (There was a wait to get in the restaurant because it was Mother's Day.) I was standing under this tree, and I loved the flowers against the blue sky. Tonight when I transferred the photos into my computer, I could see that there were wires and tiny electric light bulbs, hidden under the pear blossoms. (Like a lot of cities, Beverly keeps lights on its trees all year. North of Boston you need all the light you can get! I had forgotten about that when I was taking the picture this morning.) Well, I was disappointed but not defeated. I opened the photo in Painter IX and got to work with some digital pastel. The wires were everywhere. But I liked the challenge and it was good practice at drawing on the computer. I went through the photo looking for bits of the twisted wire and tiny bulbs, and used digital pastel to transform wire and bulbs into sky or blossom or leaf or branch, whatever was closer, and whatever would work. While I was at it, I cleaned up a few scraggly branches. Now it looks a lot better, and I am glad I went to the trouble, because now I have a nice souvenir of a wonderful day.

Saturday, May 10, 2008

Two of a Kind (Digitally Modified and Posterized Photo)


Two of a Kind (Digitally Modified and Posterized Photo) Originally uploaded by randubnick

A few weeks ago, on a walk around the Cummings Center Pond, I saw these two geese who were quite willing to sit still while I took several quick photos. I was so excited that they didn't fly away, and pleased to see how much detail I could see in the feathers. It was only later when I transferred the images into the computer that I realized that the two beautiful birds were standing on black plastic and a little bit of cedar mulch. Tonight I decided to see if I could salvage the image, so I opened it in Painter IX. I used digital pastel and several other little tricks to try to get rid of most of the plastic (accomplished more easily in art than in reality, unfortunately). Then I cropped and posterized the image.

Friday, May 09, 2008

Mother's Day Surprise (Posterized Photo)


Mother's Day Surprise (Posterized Photo) Originally uploaded by randubnick

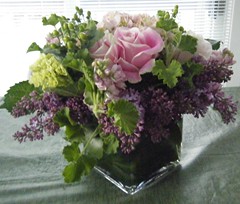
Yesterday I posted a photo of the bouquet I received as an early Mother's Day gift. I also posterized the image in Painter IX, and I really liked the effect. Here it is.

Thursday, May 08, 2008

Mother's Day Surprise

Mother's Day Surprise Originally uploaded by randubnick

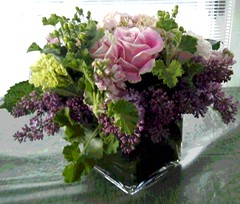
I received an early Mother's Day gift today, a beautiful bouquet of roses, hydrangea, and lilacs. It is fun to get a gift when you least expect it! The bouquet looked so beautiful in the afternoon light that I just had to take a picture. I cropped the image to improve the composition a bit, but the light and the colors are just as they came out of the camera.

Wednesday, May 07, 2008

Many Many Magnolias

Many Many Magnolias Originally uploaded by randubnick

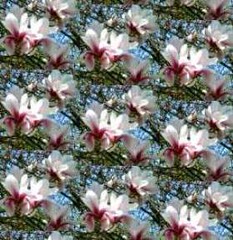
This is a pattern that I made with Painter IX, using the posterized photo that I posted here yesterday. The lines of the branches create the repeated geometric shapes in this pattern. Magnolias don't last long, so I think it is good to make the most of them while I can.

Tuesday, May 06, 2008

Blossoms on the Magnolia Tree (Posterized Photo)

Blossoms on the Magnolia Tree (Posterized Photo) Originally uploaded by randubnick

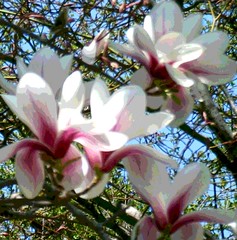
Yesterday I posted a photo of a magnolia tree, taken during a recent walk through Long Hill Gardens here in Beverly, MA. This image began as a different photo from the same batch. I did a close-in crop to focus on a few blossoms, and then I posterized the image using Painter. I thought it might make a nice pattern, but more on that tomorrow.
Monday, May 05, 2008

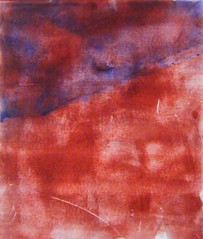
Looking Up at Magnolias


Looking Up at Magnolias (Originally uploaded by randubnick)

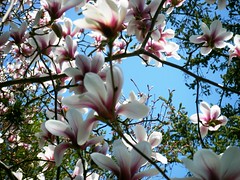
Magnolias have been blooming around here. The Boston version of spring seems to be a few very warm days, interspersed with long stretches of cool weather. This makes it impossible to put away winter clothes, but it does make for a long season of blossoming trees. If you like magnolias, this is great because they usually don't last very long in warm weather. Here is a photo that I took during a recent walk at Long Hill Gardens, standing right under a magnolia tree and looking up. I used my digital camera. When I got the image into the computer, I adjusted the brightness just a bit, though it wasn't absolutely necessary, and apart from that, this is how the image looked directly out of the camera.
Sunday, May 04, 2008

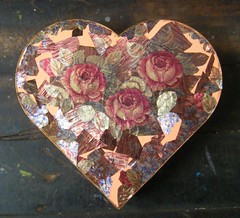
Heart Shaped Box, Edge of Top (As of May 1)

Heart Shaped Box, Edge of Top (As of May 1) Originally uploaded by randubnick

I am making a keepsake box, using printed metallic ribbons to create collage and decoupage patterns. I love the heart-shaped box, which originally held a Mother's Day gift from my daughter. A few days ago, I took a little break from a hectic week to work on this project for an hour. Even though the top of the box isn't yet finished, I have been working on the edge of the top, trying to use a scrap of ribbon in a red and gold paisley pattern that I knew it would be very hard to find if I put it aside. I recently found another scrap of the same pattern, but there was a lot of gold in it, so this time I used it, making sure to distribute the gold pieces all the way around the box. Making this project might sound tedious, but I love, love, love working on it.

Saturday, May 03, 2008

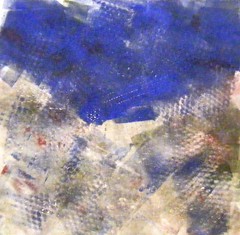
Rocky Slope and Blue Sky (Chine Colle)

Rocky Slope and Blue Sky (Chine Colle) Originally uploaded by randubnick

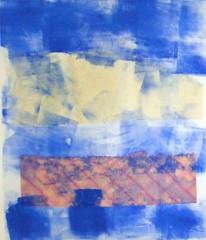
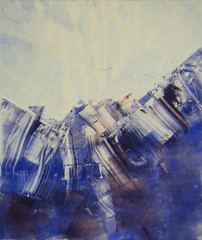
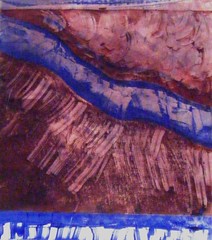
This is the fourth and last of the images that I made Tuesday night in printmaking class at Red Brick. We learned to do Chine colle monotypes this week. The process combines collage and printmaking. I used two plates with all the images, one to attach pasted paper to the print, and the second plate to apply the ink. Another member of the class brought in some great paper to share, and I used two different textures for this print. My imagery comes from my memories of the Colorado mountains. Well, there is certainly an element of surprise in this process. You can't completely control what happens in the printing press. In this piece, the brown mountain shape moved in the press, and slid down a little bit (which is why I thought about calling this piece "Slippery Slope".) Then, when I put the second plate (the inked plate) into the press, I didn't line it up exactly where the first plate was, so I got a double imprint. That created some extra horizontal lines which I like, so I didn't mind that at all. Even though it didn't turn out exactly as planned, I like this image. Art reminds us to be open to the unplanned and random workings of the accidental.

Friday, May 02, 2008

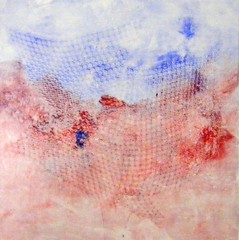
Western Landscape (Chine Colle)

Western Landscape (Chine Colle) Originally uploaded by randubnick

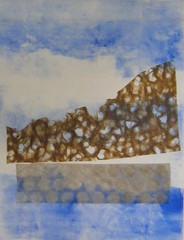
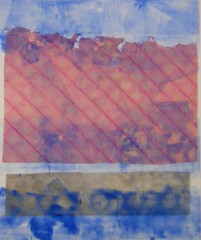
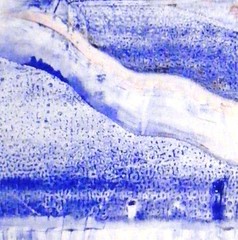
This is the third of four prints from Tuesday night's printmaking class at Red Brick. This week we learned to create Chine colle. The process combines collage with printmaking. I made four pieces that night, and for each of them, I used two plates, one to press the collage material onto the paper, and a second to apply blue ink. (You don't necessarily need to do two plates or even use ink at all for this process. However, I wanted to learn as much as possible, which can mean making mistakes. And I did.) I started with a mountain shape cut out of some paper that had an interesting texture, and combined it with the pink paper at the bottom of the composition. I liked the composition of the papers on the plate. I also got a second plate ready with blue ink. But I was disappointed with the result for two reasons. First, when I ran the print through the press the first time, I could see that all that interesting texture had been completely flattened by the press. Then when I ran the inked plate through the press, I was disappointed because I had put too much ink on the plate, so the color was too thick, making it hard to see the mountain shape. But all of this has to do with expectations: if I just look at the image for what it is, rather than for what I expected it to be, I think it is fine. In fact, it does still look a little bit like the mountains in a thunderstorm. So let's just say that I am not sure that this piece is finished. I am considering painting or drawing into the image to make the mountain shape a little bit easier to see. (Chine colle often includes drawing at some point in the process, so this is an opportunity to learn another approach.) More later on this one. Maybe.

Thursday, May 01, 2008

Landscape with Pink Mountains (Chine Colle)

Landscape with Pink Mountains (Chine Colle) Originally uploaded by randubnick

This is the second piece that I made in printmaking class on Tuesday night. This is a Chine colle, a process that combines collage and printmaking. Another person who is taking the class brought a lot of interesting paper for everyone to use. I made this image with two plates (a "double drop"). I cut two shapes for my mountain landscape out of pink and brown patterned paper, then applied paste to the back, and arranged them on the first plate. I prepared a second plate with blue ink, applied with a brayer in areas where I thought I wanted to apply color to the image. Then I ran my paper through the press with the first plate, to get the pasted papers to stick to it. Then, leaving my paper in the press, I removed the first plate and immediately substituted the second in exactly the same place. Then I ran the image through the press a second time to get the blue areas. The result wasn't perfect; the pink piece at the top was a bit off-center, but it looks fine with a bit of cropping. Even so, this is the best print that I made Tuesday night. I was (and still am) very excited to see what can be done with this process.

Wednesday, April 30, 2008

Mountain and Sun (Chine Colle)

Mountain and Sun (Chine Colle) Originally uploaded by randubnick

Last night in printmaking class at Red Brick, we learned to make Chine-colle prints. Chine-colle means pasted paper, and the process combines collage and printmaking. We put glue on the pieces of paper to be collaged. arrange them on the plate glue side up, and run the plate through the printing press. The result is a collage. Chine-colle can also be combined with printing with ink. This is the first of four Chine-colle prints that I made last night. The instructor suggested we make a Chine-colle with a drawing or a picture. I didn't have anything at hand, so I made a quick drawing of a mountain and sun with magic marker. I used textured paper for the band at the bottom of the composition. I also inked a second plate with blue because I wanted to try a "double drop" (two plates) to see how the printing and collage worked together. This is what the image looked like when I was finished. The only disappointment was that the textured paper was completely flattened by the press. Otherwise, I was happy with the image, but more important, very excited about learning this new process.

Tuesday, April 29, 2008

Heart Shaped Box, Edge of Top (As of April 23)

Heart Shaped Box, Edge of Top (As of April 23) Originally uploaded by randubnick

This is a side view of the collage and decoupage project I have been working on, a keepsake box covered with pieces of printed metallic ribbon. The heart-shaped box originally held a Mother's Day gift from my daughter. When I worked on this last Wednesday, I didn't have much time, so just intended to add some pieces of brown ribbon to the background of the floral design on the top. But I found a good sized piece of ribbon in a red and gold paisley design that I really like. I used it to make my "Ribbon Roses Tray" last year, and I didn't think I had very much left. So I decided to start the edge of the top of my heart-shaped box by pasting pieces of the red and gold paisley pattern all around the edge, turning the box as I worked. I will have to use other patterns to complete this, but now I have some pieces of red paisley throughout the edge of box.

Monday, April 28, 2008

Heart Shaped Box (Collage Day 5)

Heart Shaped Box (Collage Day 5) Originally uploaded by randubnick

Last Wednesday morning, I had to go over to the studio to put away my stuff from printmaking class on Tuesday night. It was a busy week, and I wasn't intending to stay and make art. But once I opened the door to the studio, I decided that the outside world could wait for just a little while. So I worked on this project, a heart-shaped box that once held a Mother's Day gift from my daughter. I have been creating a collage and decoupage project out of it with printed metallic ribbons. Because I wasn't planning to stay long, I decided to concentrate on filling in the background with pieces of dark brown ribbon. I also added a bit to the leaves and flowers when the right piece appeared. (Because the right piece of paisley pattern ribbon turned up, I also started working on the side of the box lid. That isn't visible in this photo, but I will post a side view tomorrow.) I stayed for just an hour, but left the studio with more energy to draw from as I returned to the outside world, which was still there, waiting for me.

Sunday, April 27, 2008

First Light on the Mountain (Monotype)

First Light on the Mountain (Monotype) Originally uploaded by randubnick

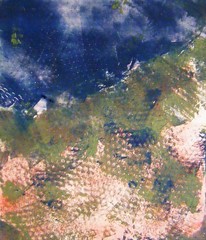
This is the last print of four from printmaking class last Tuesday night. For this one, I re-used a plate in order to keep the same composition, but I added more ink in green and a teal blue. I also ran the brayer over some netting to add texture. Although it was late and I was really tired when I finally finished this print, I was glad I kept going because I thought it was the best of the four prints I made that night. The combination of dark blue sky and pink mountains reminds me of looking toward the mountains west of Boulder as they reflect the rays of the eastern sunrise.

Saturday, April 26, 2008

Purple Sky and Red Mountains (Monotype)

Purple Sky and Red Mountains (Monotype) Originally uploaded by randubnick

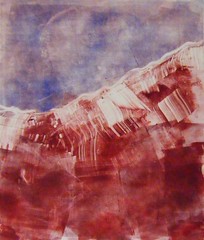
This is the third of four prints that I made Tuesday night in printmaking class at Red Brick Studios. For this image, I began with a plate that already been printed. (It was one of two plates used to make the image posted here on April 23rd.) My original idea was to do a ghost print of the plate by running it through the press again, but there wasn't enough ink left on the plate. So I put additional ink on the lower portion of the plate, and carved out the white areas by removing the ink with a piece of cardboard. I left the top portion of the plate alone, so in this image, the area that looks like sky is actually a ghost print.

Friday, April 25, 2008

Matza (Posterized Photo)

Matza (Posterized Photo) Originally uploaded by randubnick

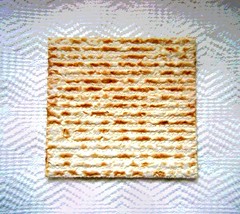
I like to send e-mails to wish close friends and family a happy Passover, but this year I couldn't seem to get that done, not only because the week was very hectic, but also because I couldn't seem to get an idea for a Passover image. Well, I thought about this off and on all week, but had no good ideas. None. In the meantime, I started every day with matza for breakfast. I like to butter my matza, but it breaks into pieces if I butter it on a plate, so I put in on a paper towel. Now, mind you, I have been eating matza for breakfast everyday this week (not to mention sometimes for lunch and for snacks). Same routine, every time. Well, this morning I knew I had to send greetings out or else because Passover would soon be over, and as I made coffee, I considered punting and sending a photo of spring flowers or maybe going with a nice commercial e-card. I was still thinking as I got my matza out for breakfast and put it on the paper towel to butter it. I found myself admiring the pattern of the matza against the pattern of the paper towel. And suddenly the light dawned on Marblehead (as they say in Massachusetts) and I decided to take a photo of the matza for my little Passover e-mails. Once I transferred the photo into my computer, I posterized the image in Painter IX, and added a little more color with transparent "digital pastel". So here is my Passover image, with a tip of the hat to Bounty for the great pattern in the paper towel and Streit's Matzohs for the beautiful patterns in the matza. I can still use this image this year, although we are almost in the "Belated Passover" greetings category, and Hallmark has no card for that. But I also made this photo into a pattern in Painter IX, so I can use the pattern to make new designs when it is time for Passover next year.

Thursday, April 24, 2008

Dark Blue Mountain (Monotype)

Dark Blue Mountain (Monotype) Originally uploaded by randubnick

This is the second of four prints that I made on Tuesday night in the printmaking class at Red Brick. I used two plates to make the first print (posted here yesterday). After that, my next idea was to use those plates again to make ghost prints (by running the plates through the press again), but there wasn't enough ink left on the plates to do that. But I did want to keep the a similar composition. So I added more ink to each of the plates. For the print in this post, I added blue and red to the bottom part of the plate, rolling the colors on with a brayer. Then I used cardboard to scrape out the highlighted areas of the mountain peaks. I left the top part of the plate alone, so the sky is really done as a ghost print. This image really reminds me of the Colorado mountains back home!

Wednesday, April 23, 2008

Red Mountain Stormy Sky (Monotype)

Red Mountain Stormy Sky (Monotype) Originally uploaded by randubnick

This is the first of four prints I made in last night's printmaking class at Red Brick. I made using with two plates, one inked with blue and one with red. I tried to create texture with some cut paper, but that technique didn't work because the printing press flattened the paper so much than none of the ink came through. But instead of giving up, I revised my idea in mid-stream, and actually added blue ink to the plate while it was still in the press! This was clearly the most frustrating of the four prints I made last night, and it is probably also the least successful from a visual standpoint. But I learned a lot from doing it, and I am glad I decided to keep going.

Tuesday, April 22, 2008

Carpet of Blue Flowers (Posterized)

Carpet of Blue Flowers (Posterized) Originally uploaded by randubnick

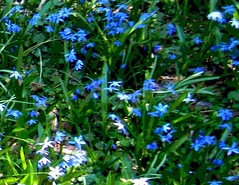
This began as a photo taken during a recent walk at Long Hill Gardens. These little blue flowers are blooming everywhere, creating the effect of a blue carpet. The scene they create looks magical, like Munchkinland (where everything is blue) in The Wizard of Oz. Well, I am a sucker for magic, so I took some pictures with my little digital camera. I wanted to capture the effect of a blue carpet with a wide shot, but I also took some closeup shots as well. Once I transferred the images into my computer, it was easy to see that the close-in views work much better. So I cropped and then cropped again to get a good view of the flowers in a pleasing composition. Then I posterized the image in Painter IX. I like the effect of the sunlight playing on the little blue flowers.

Monday, April 21, 2008

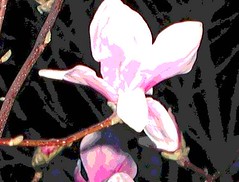
Magnolia Blossom Up Close (Posterized)


Magnolia Blossom Up Close (Posterized) Originally uploaded by randubnick

It is the third week in April, and about time for the magnolia tree to bloom. I have seen a few magnolia trees blooming around town, but the one in my yard is budding, not yet blooming. This tree is in a shady location, on the north side of the house, but I think it will bloom tomorrow if it is warm enough. This image began as a photo that I took of the same magnolia tree a few years ago, and I decided to posterize it tonight. Flowers help us mark the seasons, and in Boston, along with baseball and the Boston Marathon, April means magnolia trees.

Sunday, April 20, 2008

Heart Shaped Box (Collage Day 4)

Heart Shaped Box (Collage Day 4) Originally uploaded by randubnick

On Friday morning, I went to Red Brick to work on this collage/decoupage project. The heart-shaped box once held a Mother's Day gift from my daughter. Now I am transforming it into a keepsake box, using metallic ribbons printed with floral and paisley patterns. On Friday, I concentrated on the border, which is going to be blue forget-me-not flowers and leaves. I also added more leaves around the roses. Progress seems slow because I have to find the right piece of the right pattern, and then make it fit. With the flowers and leaves, I try to place the pieces so the result looks somewhat natural or believable (so each leaf looks like it could be attached at that angle, etc.). The experience is much like doing a jig-saw puzzle in reverse. However painstaking the work, it is not tedious to me, and I am having a great time. This is fortunate, because this is just the top of the box, so there is quite a bit left to do.

Saturday, April 19, 2008

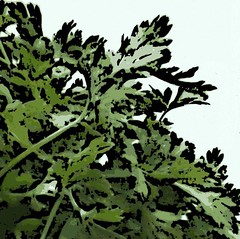
Passover Parsley (Digital Woodcut)

Passover Parsley (Digital Woodcut) Originally uploaded by randubnick

I always buy a big bunch of parsley for Passover. I love the taste of parsley and I always eat any that comes my way! But I also love the way it looks! This image began as a photo that I took of a bunch of parsley on my kitchen counter. I decided to make the photo into a digital woodcut with Painter IX to emphasize the texture of the leaves. Then I used a gentle color overlay on the background. This may sound like a lot of trouble for something that is usually just a garnish, easily overlooked. But on Passover, parsley becomes part of the rituals of the seder. (It is dipped in salt water, combining the hope of spring and the remembrance of tears). Ritual, like art, can call our attention to things that we ordinarily overlook.

Friday, April 18, 2008

Patterns on the Mountains (Monotype)

Patterns on the Mountains (Monotype) Originally uploaded by randubnick

This is the third print from Tuesday night's printmaking class at Red Brick. I am using the mountains (Colorado Rockies) as subject matter. For all the prints I made this week, I experimented with using materials to create texture. For all three prints that I made, the material I used was some netting, the kind used to package fruits and vegetables. In the first print (posted two days ago), I ran the plate through the printing press with pieces of netting on it. The second print (posted yesterday) is a ghost image of the first, so the grid pattern was made by ink that remained on the plate once the netting was gone. For this third print, I put the pieces of netting under the brayer and then ran the brayer back and forth over the netting to create texture. Then I ran the plate through the press, and this is the result.

Thursday, April 17, 2008

Ghost Print of Mountains with Sky and Grid (Monotype)

Ghost Print of Mountains and Sky with Grid (Monotype) Originally uploaded by randubnick

This is the second of three prints that I made in Tuesday night's printmaking class at Red Brick. After I made the first print (Mountains and Sky with Grid, posted here yesterday), I could see that there was still a good amount of ink left on the plate, so I decided to try making a ghost print from the plate. (A ghost print is a print made from the ink remaining on a plate after it has been printed). This is the result: the same imagery with softer colors. I was experimenting with adding texture. I created the grid with pieces of netting, and the pattern remained on the plate after I removed the net. I didn't know if the grid pattern would show up in the ghost print, but I was glad to see that it did.

Wednesday, April 16, 2008

Mountains and Sky with Grid (Monotype)

Mountains and Sky with Grid (Monotype) Originally uploaded by randubnick

Last night was the first of three more printmaking classes in a session I am taking at Red Brick Studios. I am using memories of the Colorado mountains for my imagery because I love the mountains, and often paint them. With familiar subject matter, I can focus on process, which certainly gave me enough to struggle with last night. I decided to experiment with adding texture with various materials. Of the materials available, I chose netting (often used for packaging oranges) because I liked the square grid pattern. For this print, I used one plate, and applied red and blue pigment to create mountains and sky, using a small, narrow brayer to create some variation in value. Then I tore triangular pieces of netting, ran the brayer over them to try to get them to stick, and then put the whole thing through the printing press, net and all. After running the plate through the press, I was VERY disappointed because the netting had left very strong white areas that overwhelmed everything else in the image. But instead of taking the print off the press and discarding it, I removed the netting from the plate and ran the press over the plate (and the same piece of paper) a second time, in the other direction, and the result was the image posted here here. The added color from the second time through really helped. The netting was still visible, but more subtle, and the mountains and sky could also be seen clearly. I was much happier with the result. The grid inexplicably floating in the sky is surreal and illogical, but makes me think about visual puns (sky and water), and verbal puns, like cell phone networks or internet crisscrossing the mountains. In any case, I am glad I kept going and found a way to salvage this image.

Tuesday, April 15, 2008

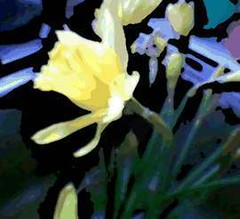
Daffodils in the Sink (Digital Woodcut)


Daffodils in the Sink (Digital Woodcut) Originally uploaded by randubnick

Yesterday I posted a posterized version of a photo of daffodils, taken back in 2006. Yesterday I also made a digital woodcut of the same image. I used Painter IX and played around with the options until I had the amount of black and the number of colors that I wanted. I think this version is a bit more dramatic than the posterized photo.

Monday, April 14, 2008

Daffodils in the Sink (Posterized Photo)


Daffodils in the Sink (Posterized Photo) Originally uploaded by randubnick

Today was a busy day, but while I was right in the middle of a very important conversation, I realized that I was looking at daffodils blooming outside. That's when I realized that after all this waiting around for it, spring snuck up on me while I wasn't looking! Unfortunately, there was no chance to take pictures of the daffodils I saw today. I hope I will another opportunity, but meanwhile tonight I found some photos of daffodils that I took back in March of 2006. The one I like best is very simple picture of daffodils in my stainless steel kitchen sink, as I got them ready to go into a vase. Tonight I opened the photo in Painter IX and used digital pastel to clean up one little distracting piece of foliage. Then I posterized the photo, and here it is.

Sunday, April 13, 2008

Heart Shaped Box (Collage Day 3)

Heart Shaped Box (Collage Day 3) Originally uploaded by randubnick

This weekend I spent a little time working on this project. This is a heart-shaped box which originally held a Mother's Day gift from my daughter. Now I am transforming it into a keepsake box with collage and decoupage. I am using printed metallic ribbons with acrylic medium and a little bit of metallic acrylic paint for the edges. This weekend I worked mainly on the border, using going to little blue forget-me-not flowers and golden leaves cut out of the ribbons. I still have a lot of ribbons, but there are only two remaining that have a floral design. So it takes a little time to find the pieces I need. I am not doing a lot of planning, but just let the design develop as I work, and I sometimes I feel like I am watching this thing assemble itself. Well, I only worked on this for a short while, but it was wonderful time spent in this fantasy garden.

Saturday, April 12, 2008

Basket of Pansies (Posterized)

Basket of Pansies (Posterized) Originally uploaded by randubnick

This is the photo that I posted yesterday, but posterized with Painter IX. I adjusted the levels of posterizing until I got the variation in shape and color that I was after. I am glad that I stopped rushing through my errands just around long enough to take this picture at the grocery store.

Friday, April 11, 2008

Basket of Pansies (Digitally Modified Photo)

Basket of Pansies (Digitally Modified Photo) Originally uploaded by randubnick

Here north of Boston, it's a long wait for spring weather, although we are finally getting some warmer days here and there. Today there were baskets of pansies on display outside the supermarket, a sure sign of confidence that spring is coming. Pansies can be planted when the temperatures are still too low for anything else. I was happy to see the pansies and took some quick pictures with my phonecam. I liked this photo the best, so I cropped out a truck that was in the background, and adjusted the contrast. Then I opened the image in Painter IX and used digital pastel to repair some torn petals on one flower. I also used digital pastel so simplify a distracting pattern in a small area of the background. This was a bit of fuss for this little image, but I thought this photo had potential and I wanted to clean it up to posterize it. To be continued. . . .

Thursday, April 10, 2008

Bass River, Beverly MA (Posterized Photo)

Bass River, Beverly MA (Posterized Photo) Originally uploaded by randubnick

This is a posterized version of the photo I posted here yesterday. I opened the image in Painter IX and adjusted the posterizing controls until I got the effect I wanted, the bright lights dancing on the water.

Wednesday, April 09, 2008

Bass River, Beverly MA (Crop)


Bass River, Beverly MA (Crop) Originally uploaded by randubnick

This is a crop from a photo that I took one night last week with my digital camera when we stopped at Beverly's newest Starbucks. The dog and I waited in the car while my daughter ran in to get coffee. The parking lot has a great view! I loved the lights of the city on the water so I grabbed my digital camera and took a quick picture without thinking about settings or even the fact that my headlights were on! And then it was time to go. Later, when I transferred the picture into the computer, I could see that the headlights had indeed ruined the foreground, and I needed to crop out the car's interior. But still, once I had done the cropping, I did have a nice image of what interested me most, the city lights reflected in the quiet river. Because of the darkness and the aggressive cropping, the focus is very soft. (It's not the camera this time; it's the photographer!) But I kind of like the effect of the soft focus. And I think it has possibilities for a posterized image. To be continued. . .

Tuesday, April 08, 2008

Heart Shaped Box (Collage Day 2)

Heart Shaped Box (Collage Day 2) Originally uploaded by randubnick

Today I finally had a chance to go back to the studio and work on this project. I am making a collage and decoupage project from this box that originally held a Mother's Day gift from my daughter. I am creating the design using printed ribbons, two or three inches wide. Today I added some forget-me-knot flowers around the edges of the heart. (After all, this is going to be a box for keepsakes.) I also used some gold metallic paint (acrylic) around the rim of the box. This will make it a bit easier when I am pasting ribbon near the edges. The paint is transparent in thin coats, and works well with the ribbons I am using, all of which have a metallic sheen. I had a great time this morning. The hour flew by and it was hard to stop! To be continued. . . .

Monday, April 07, 2008

Mountain Silhouettes (Ghost Print)

Mountain Silhouettes (Ghost Print) Originally uploaded by randubnick

This is the second print that I made last Thursday night at printmaking class at Red Brick. It was made by printing a plate a second time without re-inking it, creating a paler version of the same image. I had already made a monotype using two plates (see yesterday's post). I removed the shapes cut from myelar (inked in red); there was still plenty of blue pigment left on the plate, especially where those myelar shapes had been. So I used the plate to print on another piece of paper, and here it is. I was surprised by some of the effects, but pleased on the whole. The texture was created when I pulled off up the myelar sheets, and there are also some traces of red pigment. The image reminds me of the Colorado mountains on a snowy day.

Sunday, April 06, 2008

Mountain Silhouettes (Monotype with Two Plates)

Mountain Silhouettes (Monotype with Two Plates) Originally uploaded by randubnick

I made this monotype in Thursday night's printmaking class. We each made a print using two plates. The teacher also demonstrated how to use shapes cut from myelar sheets. I am still using familiar mountain imagery so I can concentrate on learning the process. First I made the cutouts, cutting the myelar sheet into two pieces with just one curving diagonal line, for a mountainous shape. I decided that I would use the other half of the myelar sheet at the top of the plate, so the bottom edge would create another mountain silhouette. Then I covered the first plate with blue pigment, put red pigment on the two myelar shapes, and placed them on the inked plate. I used cardboard to scrape away some of the red and blue pigment, to add texture and to create light areas where ink from the second plate could show through. For the second plate, I mixed a pink color and added some gel to create transparency. The second plate is supposed to add a layer of transparent color and perhaps texture to the print. When both of my plates were ready, I ran the first plate through the press, creating the dark red and blue areas. Then I ran the same piece of paper through the press with the second plate, creating the pink areas. The two plates weren't lined up perfectly, so there is some white at the bottom and a pink area at the top. But I liked the effect and really enjoyed learning something new!

Saturday, April 05, 2008

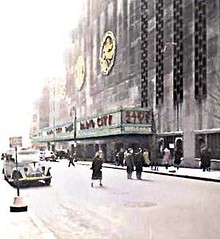
Radio City Music Hall April 1943 (Colorized and Rescued Photo)

Radio City Music Hall April 1943 (Colorized and Rescued Photo) Originally uploaded by randubnick

This is a colorized version of the photo I posted yesterday, a snapshot rescued from my mother's album. This was taken during my parents' honeymoon trip to New York, just before my dad was shipped overseas to Europe. The pink tone in the photo appeared when I scanned it into the computer, and it gave me the idea of adding more color. I used Painter's digital pastel to add some soft color, to make it look like an old tinted photograph. (I looked at some color images of Radio City because I wasn't sure of the colors. During the day, the big letters of Radio City look red, but at night when the lights are on, they look orange or yellow.) Well, in any case, I am not going for historical accuracy here. I am just using color to suggest the sense of excitement of seeing that I imagine my mom experienced when she saw Radio City Music Hall on her first trip to New York City.

Friday, April 04, 2008

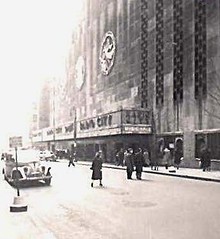
Radio City Music Hall April 1943 (Rescued Photo)

Radio City Music Hall April 1943 (Rescued Photo) Originally uploaded by randubnick

Today I found a snapshot in my mother's photo album and decided to rescue it. This album begins with my mom's first date with my dad. They met during World War II; my father was from Brooklyn but was stationed in Pueblo, and met my mom there at a USO dance. After dating just three months, they married on April 4th, and went to New York for a brief honeymoon (and for my mom to meet dad's family) just before my dad was shipped overseas. My mom kept the album going while he was away, including snapshots of what was going on at home in Pueblo, and snapshots that my dad sent home from Europe. She pasted the photos down on black paper and wrote captions for the photos in white ink. That's how I know that they went to Radio City Music Hall on April 22 to see the Easter Revue and "Flight to Freedom". This was one of several Broadway shows and performances that they saw that week, and I am sure the excitement of the trip and the shows was a great distraction for both of them, in the face of an uncertain future and the long separation ahead. I don't whether the photographer was my mom or my dad. The original snapshot is very small. I scanned it into the computer. I really liked the basic composition, so I just cropped it a bit to eliminate some sidewalk and a manhole cover. I adjusted the contrast, and used Painter IX to sharpen the focus and clean up one scratch. The pink tones were there when I opened the file in the computer. I kind of like the pink; in fact, it made me think about adding more color to the image. To be continued. . . .

Thursday, April 03, 2008

Heart Shaped Box (Collage Day 1)

Heart Shaped Box (Collage Day 1) Originally uploaded by randubnick

On Tuesday, I went up to the studio and started a project I have been thinking about for quite a while. I am going to do another collage and decoupage project, similar to the tray I made last summer (which you can find here by searching for "Ribbon Roses" or styrofoam). Just like last time, I am using printed metallic ribbon, given to me by a friend. But this time, I am covering a heart-shaped box which originally held a wonderful Mother's Day gift from my daughter. I saved the box because I wanted to make it into a keepsake box. On Tuesday, I started by covering up the big Clinique label on the front, and worked out this composition as I did so, starting with a few of the cabbage roses leftover from the Ribbon Roses Tray. I am using acrylic gel medium as the glue. I had fun placing the roses and leaves, and had a wonderful time getting this started. I know from making the Ribbon Roses Tray how laborious this can be, but I hope to avoid some of the mistakes I made last time. In any case, I really enjoyed working on this project, and can hardly wait to get back to it.

Wednesday, April 02, 2008

Yellow Crocus (Digital Woodcut)

Yellow Crocus (Digital Woodcut) Originally posted by randubnick

Two days ago, I posted a photo of yellow crocus, and yesterday posted a posterized version of it. This is a digital woodcut made from the same photo, using Painter IX. The colors are less intense, but the shapes and patterns are more apparent. I think this version has potential as a pattern, and I might try that later on in the week.

Tuesday, April 01, 2008

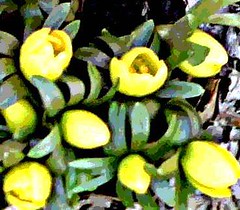
Yellow Crocus (Posterized)

Yellow Crocus (Posterized) Originally uploaded by randubnick

This is the photo I posted yesterday, posterized using Painter IX. Posterizing creates flat areas of color, like a poster. It sometimes works well with low resolution photos, like this one. In this case, I think the effect is to make the colors just a little brighter.